
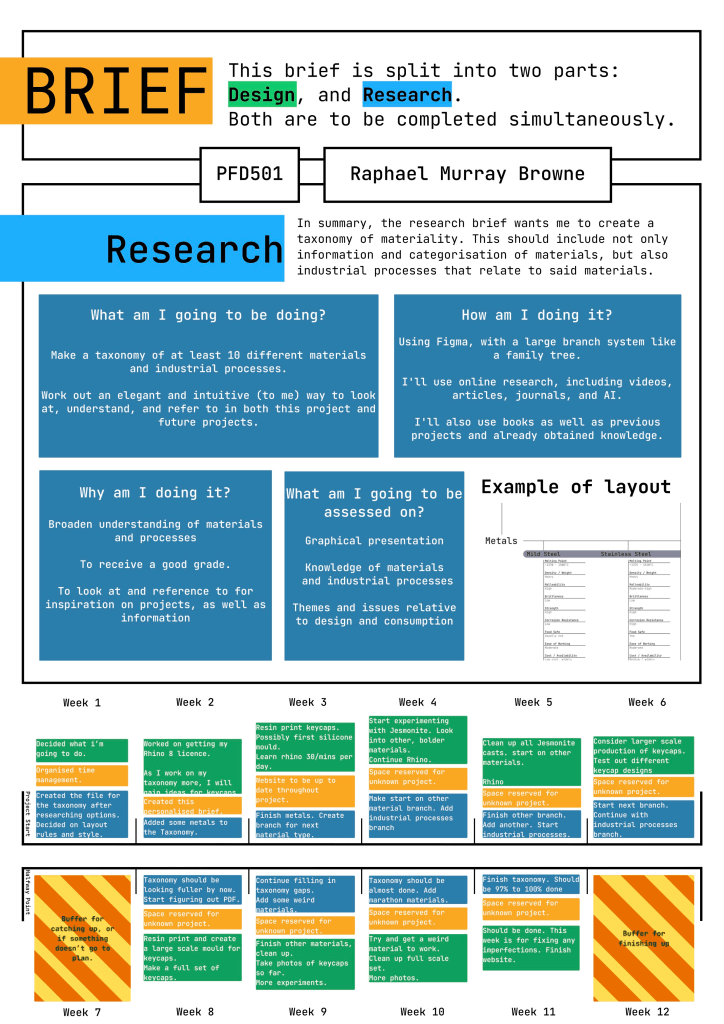
As I move into second year, I want to raise the standards of my work considerably. I could easily pass this year by coasting, but I want to push myself, and see what the limits of my creativity and ability truly are.
The Brief for this project was split into two parts.
The Research Project
Research Project Brief – Taxonomy of Materiality
Your challenge is to research and compile a Taxonomy of Materiality. This personal classification system/tool should document your critical exploration of issues relating to materials and associated production processes.
Your Taxonomy should describe your understanding of a range of materials and industrial production processes as well as associated themes and issues relative to design and consumption. Choose materials and production processes whose potential interests or excites you as a designer. Aim to include at least 10 of each, but be ambitious, this could be the start of a really useful document that you could build on throughout your studies and beyond into your design career.
Your document should be elegantly presented graphically. Include carefully chosen/cropped images and diagrams to engage your audience and reduce word count. Make sure you reference your sources and use the correct referencing system (check with Design Culture staff if in doubt). Output your document in pdf format.
The Design Project
Design Project Brief – Simple moulded object
Your challenge is to create and present a design concept for a simple object optimised for 2 part moulding.
The first thing you must do is decide what the purpose of the object is: Who is it for? What does it do? What contextual considerations will inform its design relative to utility, capability, ergonomics, and visual language?
What material properties will you exploit or celebrate?
How will constraints and opportunities of 2 part moulding processes inform your design?
Research early. Focus. Define your own Design Specification before the end of week 2 (100-150 words + relevant images). Make plenty of low resolution prototypes to test your ideas. Develop a detailed 3D CAD model of your design. Create appropriate drawings, visualisations and 2 types of final models (a neat sketch model and a moulded prototype) to enable you to present your concept to a professional standard.
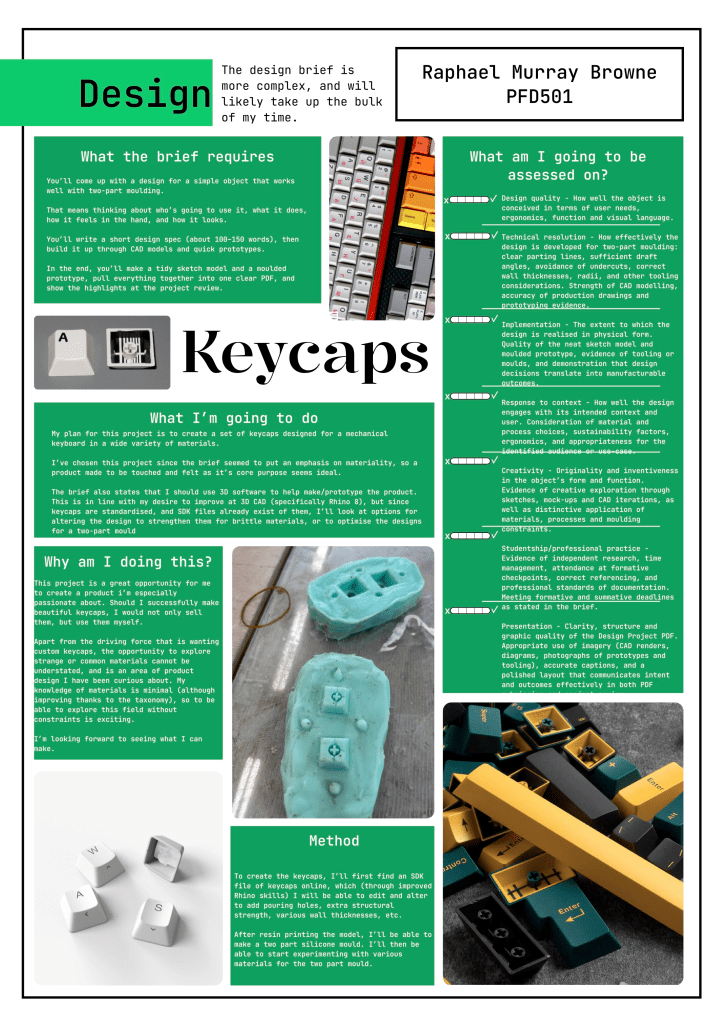
During the brief I already had a good idea of what I wanted to do. I’d been wanting to experiment with materiality, in the form of keyboard keycaps.

The world of keyboards is more expansive than many may first imagine. There is a large community of enthusiasts who spend their days buying, building, customising, and fine-tuning their keyboards to get the perfect feel, ergonomics, sound, and look.
Initial Ideas
Part of my desire for this project stems from wanting beautiful keycaps myself, but without wanting to pay the extremely premium prices charged by the few companies making these keycaps.
There are lots of materials I’m excited to see in keycap form – some more practical than others. The notable can be written down in this early stage, and treated as goals thus:
Metal – brass, coated copper, steel, maybe even gold, the possibilities with metal are endless.
Ceramic – can be glossy or matte, and has a huge range of tactility. Usually quite fragile for such a delicate object, however.
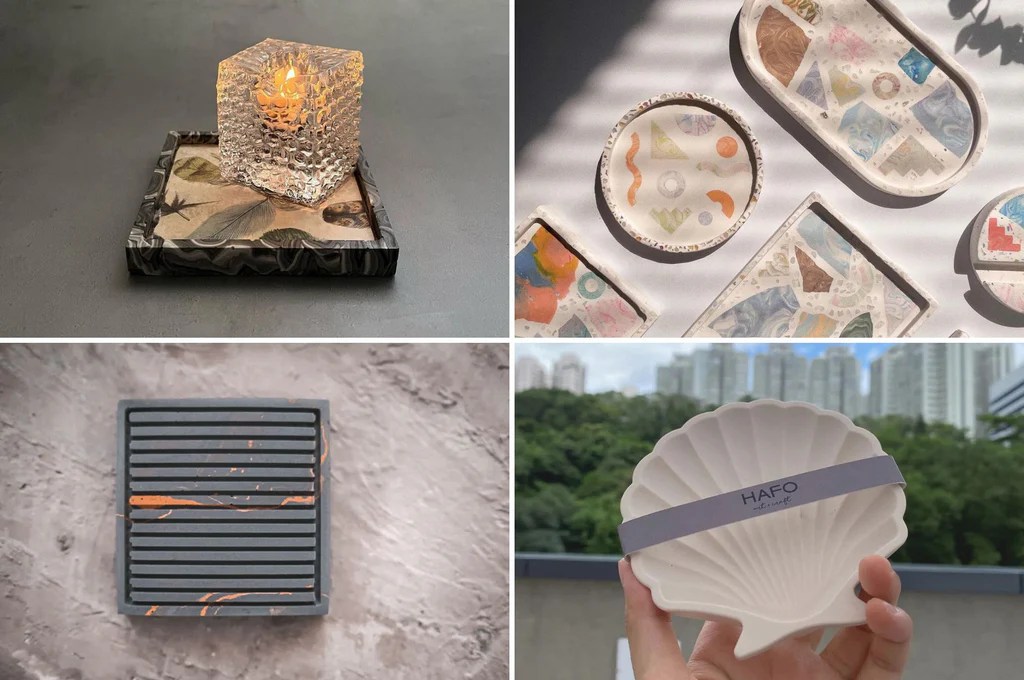
Jesmonite – a good entry point, Jesmonite is an inexpensive, eco friendly epoxy. It can take on a wide range of properties by mixing with various powdered materials.
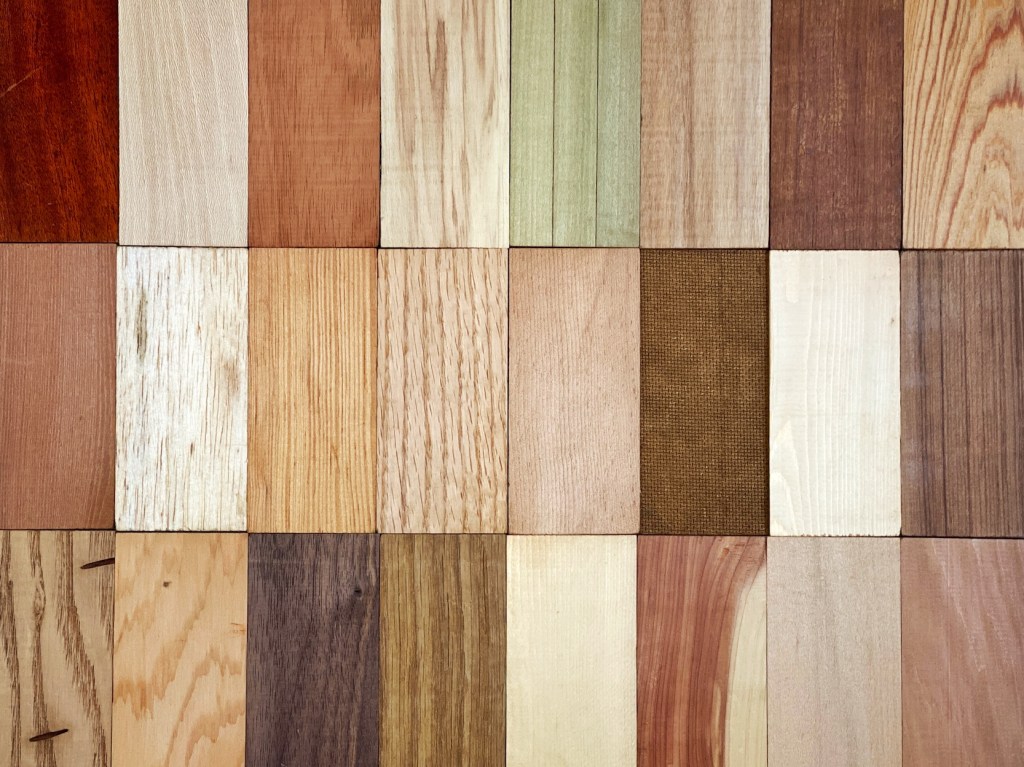
Wood – a particularly beautiful material that is rarely seen on keyboards due to the intricate cutting required to make a keycap.
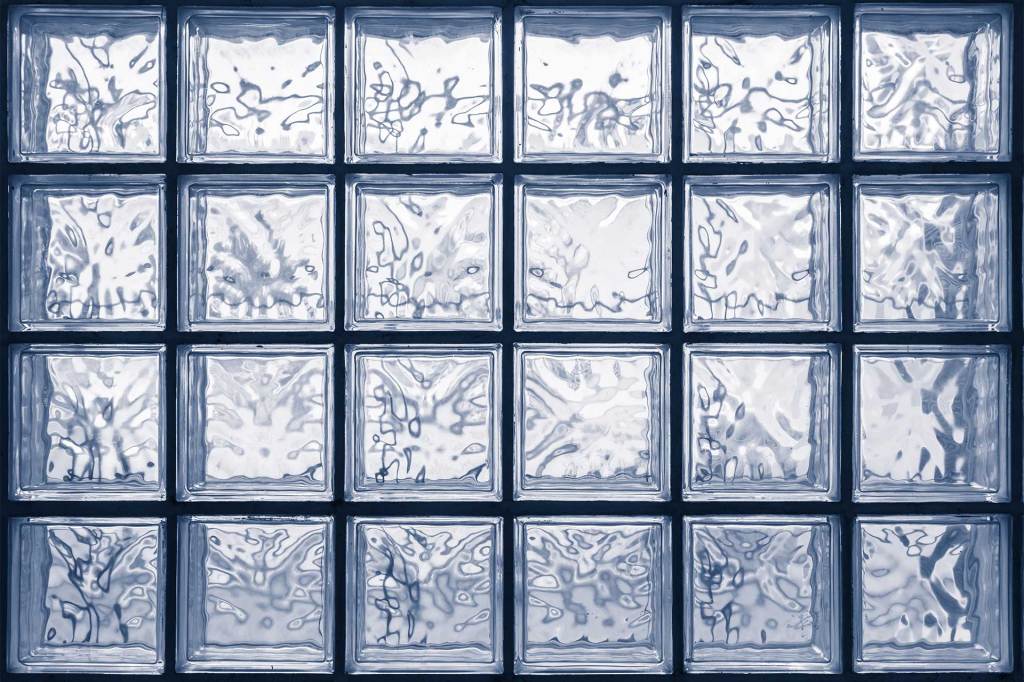
Glass – ambitious, and would require a lot of learning. but a keyboard like glass blocks would be not only unique but possibly one of a kind.
By employing keycaps as a medium, I am able to foreground materiality, positioning the investigation of diverse materials as the central component of the product.
What’s next?
With a solid idea of what I want to make, it’s time to plan the next steps, and start initial prototyping as soon as possible.
These steps are, in no set order:
- 3D model keycaps. It is likely that there are already models for keycaps out there, which can work for the initial prototyping, however I may want to edit them with 3D CAD later on (for creating better moulds, for instance).
- Research good materials for moulds, since we’ll be working with various materials, some of which may be extremely hot when casting.
- Create some keycap moulds. Possibly just one or two keycaps, initially.
Taxonomy of Materials
With my initial ideas in place, and a good idea of what I need to do, it’s time to get started on the other brief.
Since this part of the project is less of a journey, and more of a time sink, this timeline will just occasionally give an update to the taxonomy as it progresses.
The first step is to choose which program to use to make it. Current contenders include Apple’s “Freeform”, Adobe Illustrator, and Figma.
I opted for Figma, since it’s interface is very intuitive and beginner friendly, and students get plenty of resources for free.
I’ve spent some time mindlessly filling in the useful information I may want to know about materials, starting with metals, although some more formatting and better image selection may help as well.
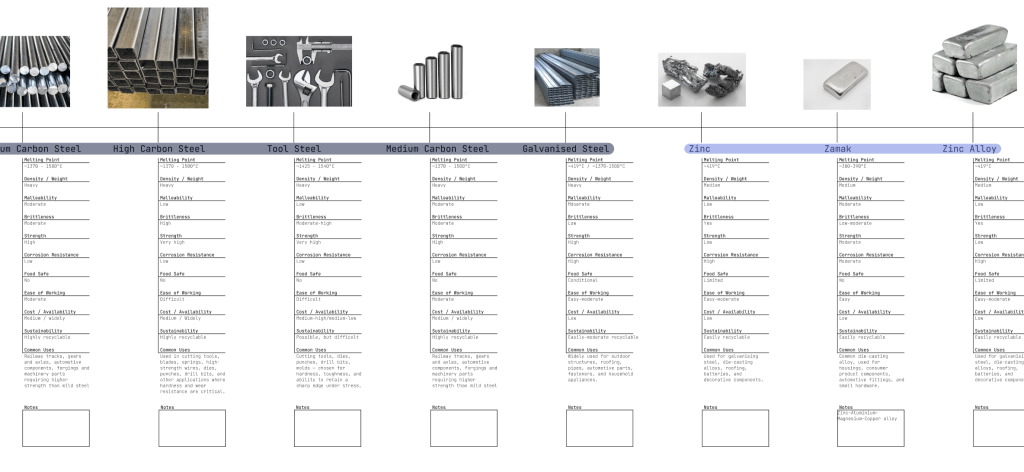
As I work on the formatting, I will add more identifiers rather than just simply having a very long “metal” branch. I divided the metals into:
- Everyday
- Lightweight
- Strong
- Decorative
- Precious
- Special
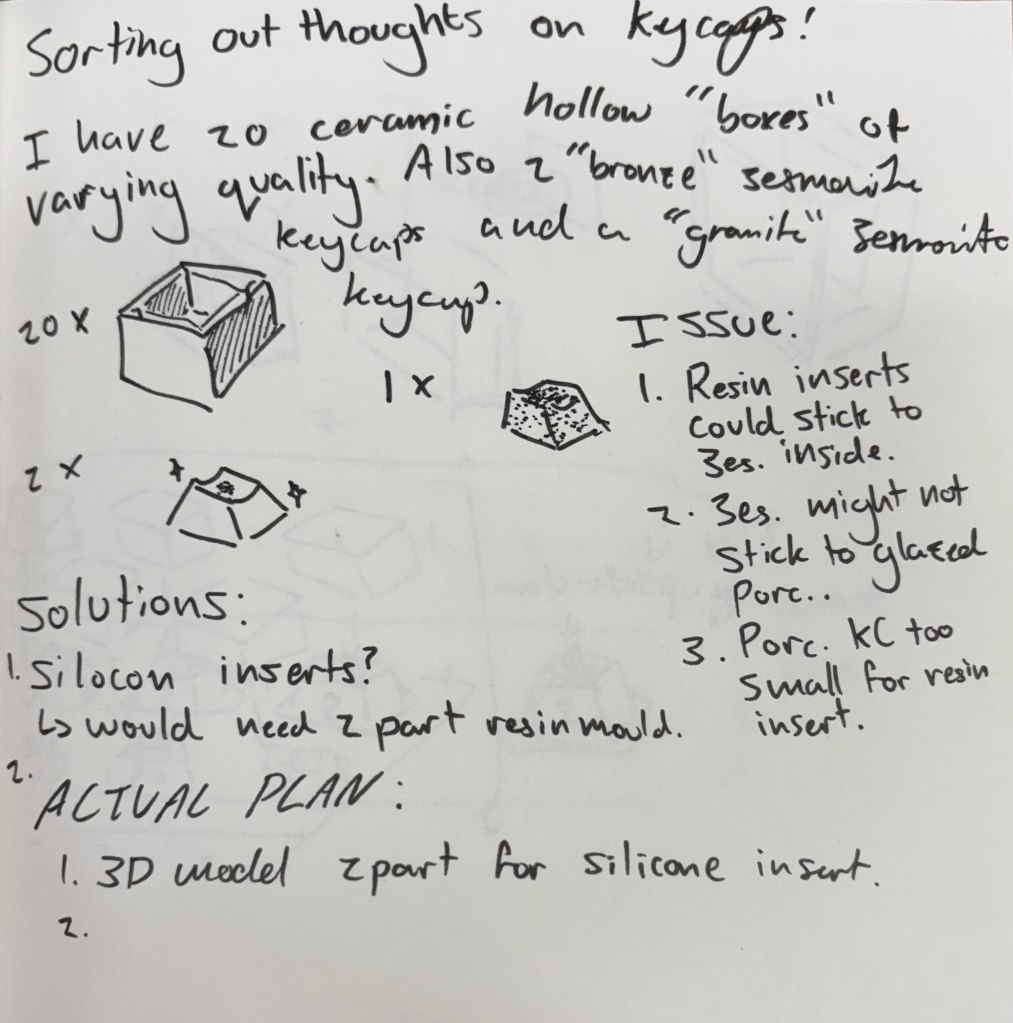
With my Rhino 8 licence sorted, I can start to learn to better use the program. While I learn the program well enough to model and alter keycaps, I can cheat a little bit with a silicone mould made from actual keycaps.
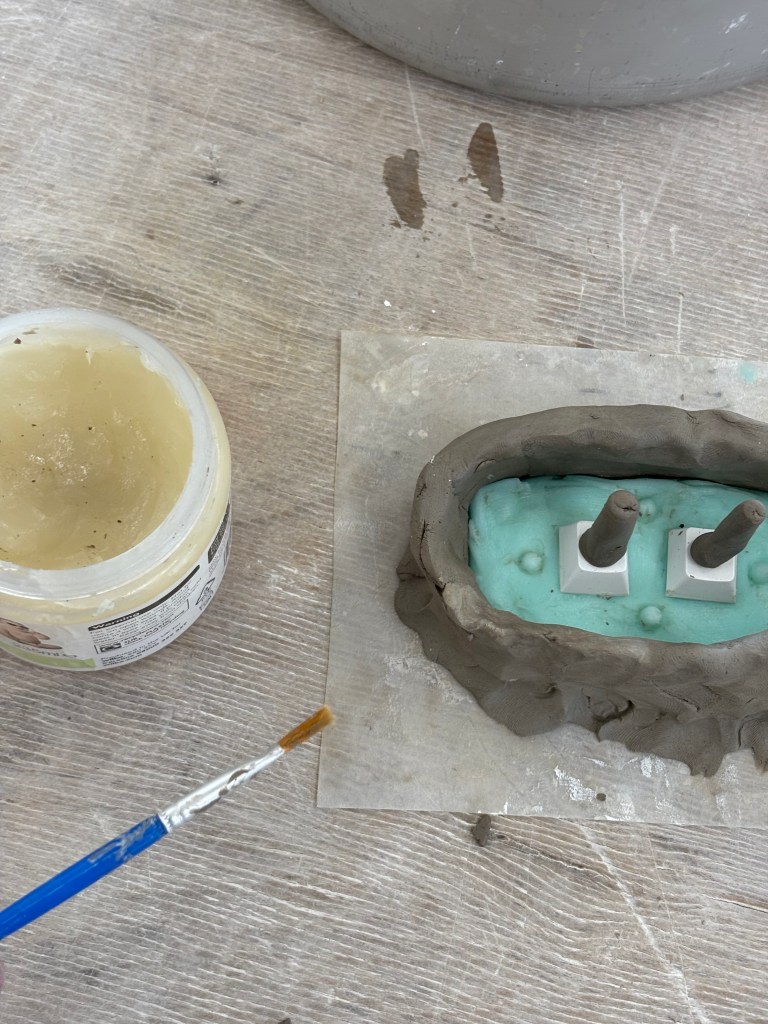
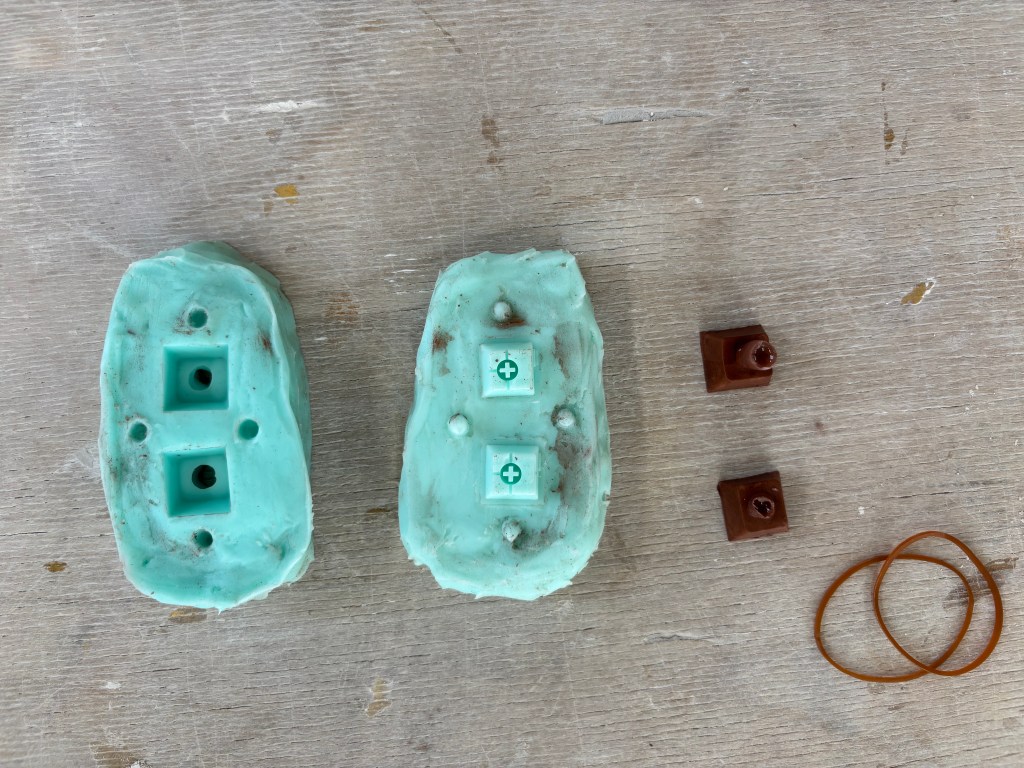
Creating the 2-part mould. I didn’t like how messy the edge of the silicone mould was from the clay encasing – I wonder if I can 3D print the mould encasement? Initial prototype: Jesmonite with brass powder.
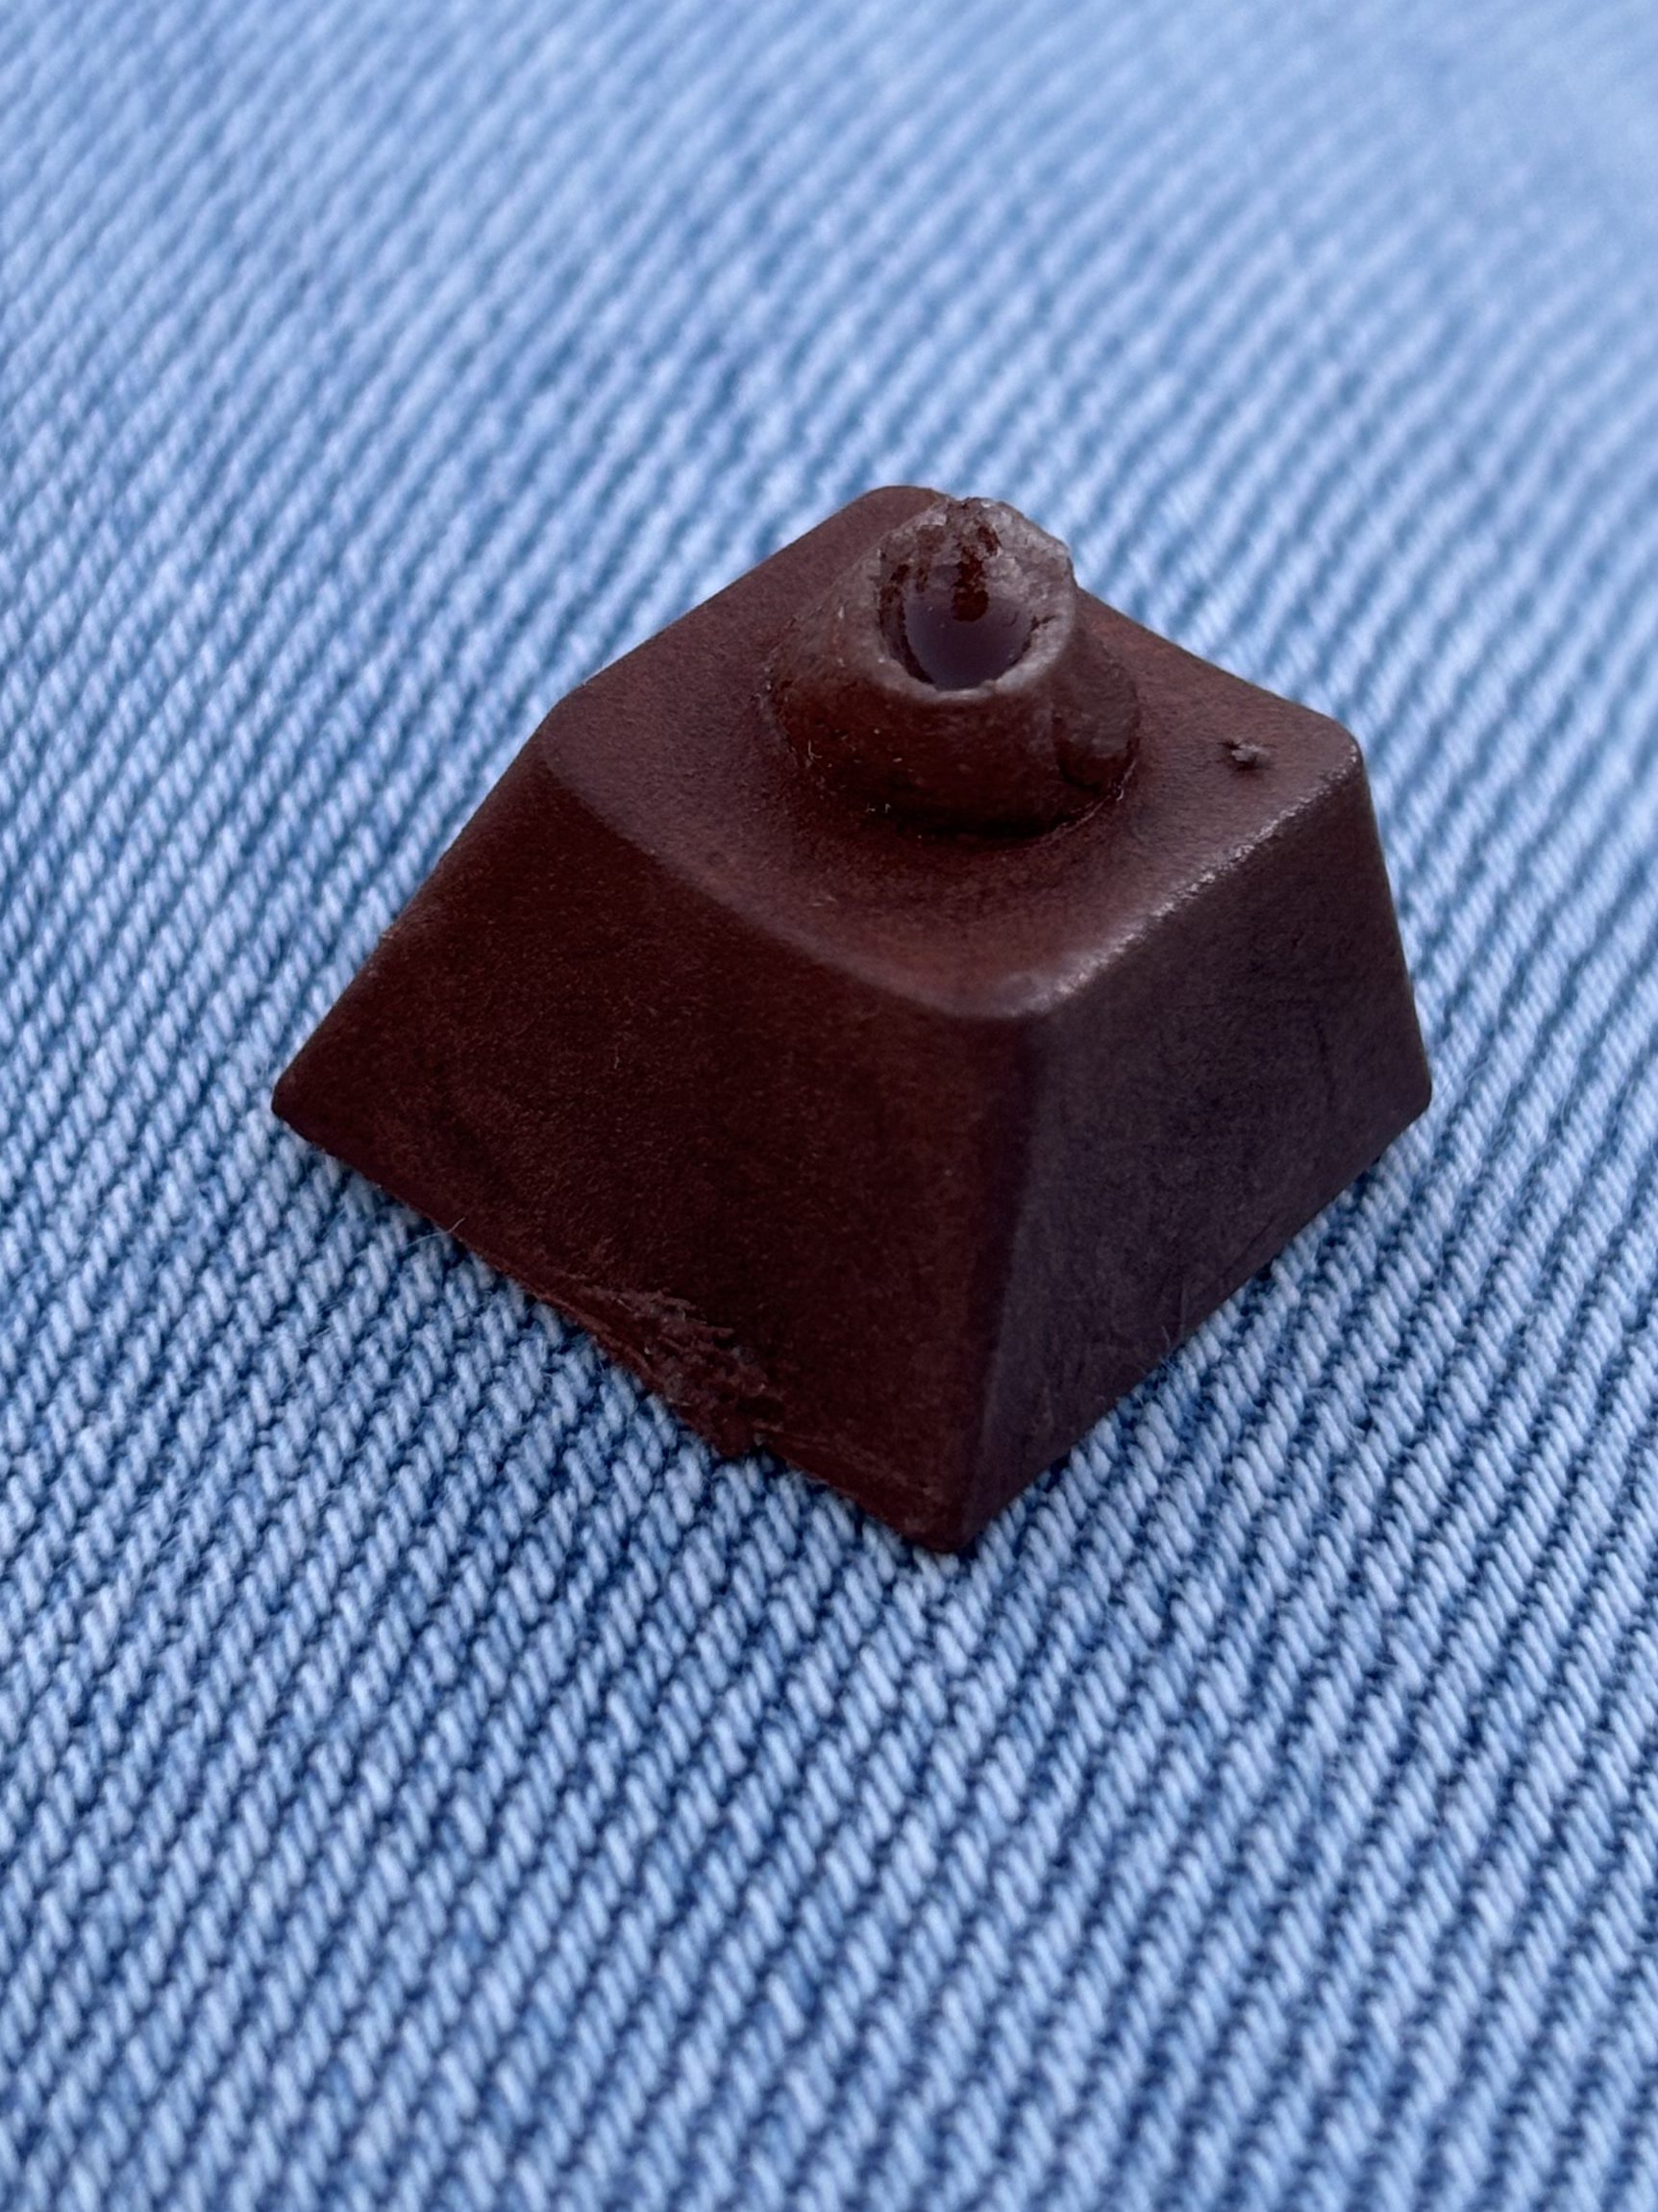
The initial outcome was darker than I expected, but I’m holding out hope that polishing it will help give the exterior some shine.
The keycap mould held remarkable detail from the original, even showing the original injection moulding lines of the keycaps used to create the mould. This means that I should put a lot of effort into creating a good mould object, since even the finest details will be captured.
The pouring hole for the jesmonite made by the clay was far too wide, and required a very large amount of post-processing to make the keycap not just presentable but usable at all. The delicate underside, however, was perfect.
Prototype 2
While I have this mould, I might as well try various different materials to see how they perform.
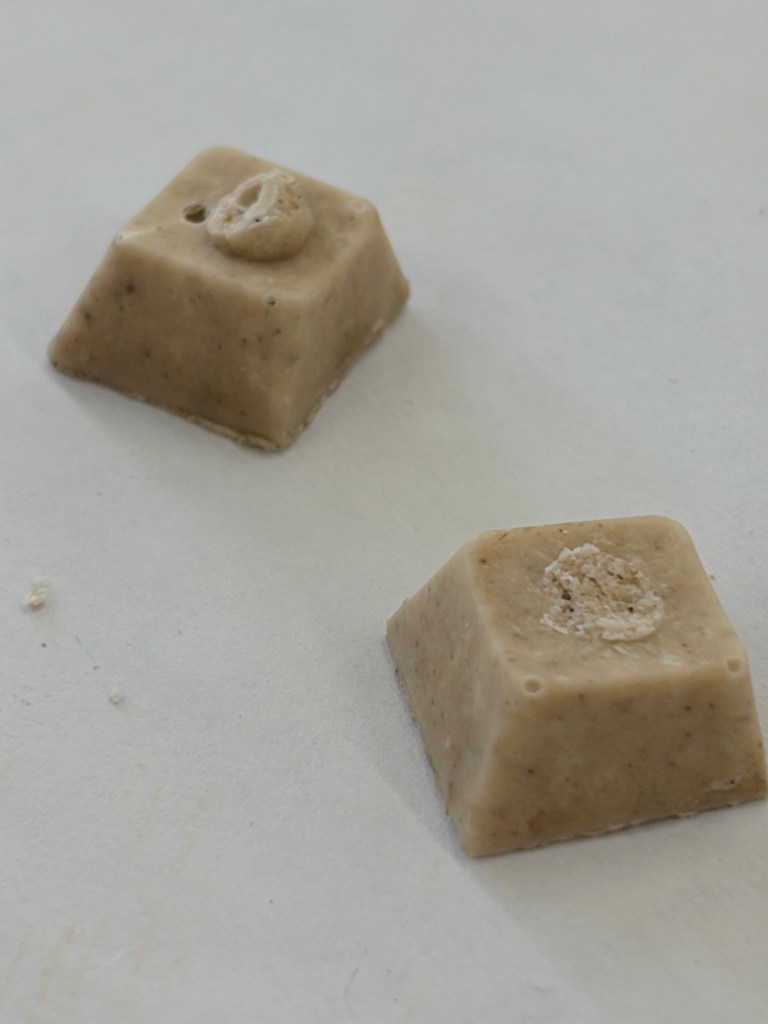
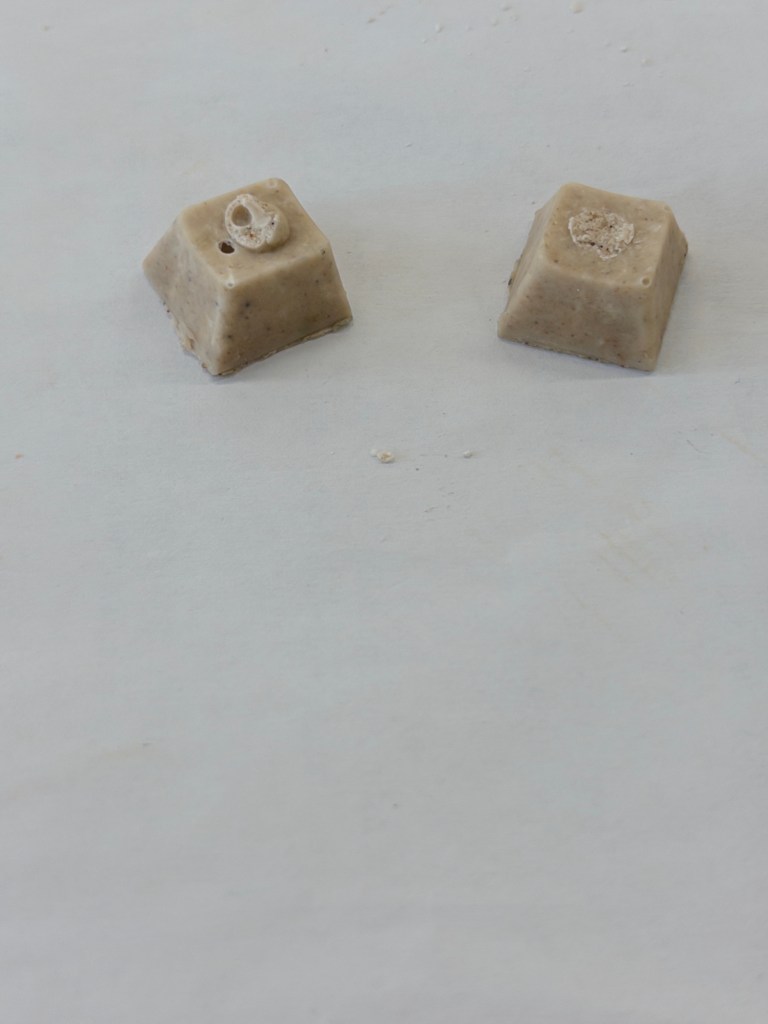
After the brass powder, I thought to go back to basics with a simple jesmonite mix without any additives. The result was an extremely brittle keycap, with a smooth surface and creamy colour. While they initially looked good, they were not suitable for actual use, as they would crumble to the touch.
In this video I use a fair bit of force to crush the keycap, however the side that has already broken off was extremely brittle. 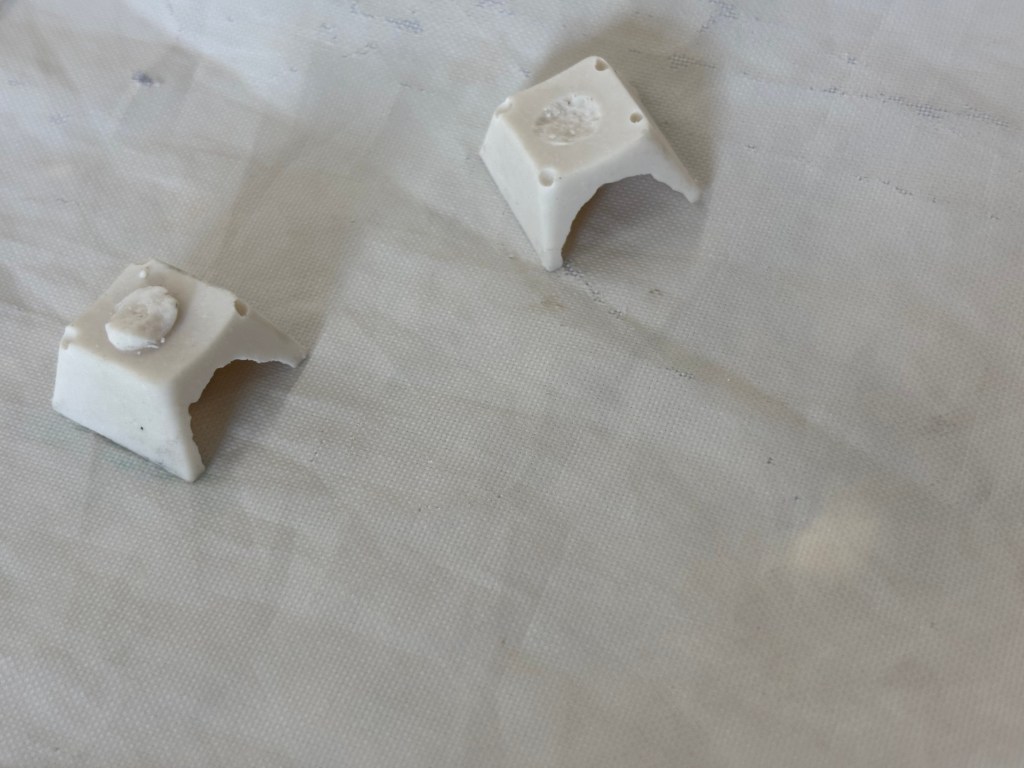
Prototype 3
In an attempt to mimic the rough matte feel of stone, I added sand into the jesmonite mix. It was predictably very weak, as the thin walls were further weakened by the aggregate instead of strengthened as they would in a larger object.
Because the jesmonite had been given more time to set, it was actually a little bit tougher than the previous prototype, although still far too weak for long term use.
Still weak enough to be crushed in one hand, although it was a little bit tougher than expected. 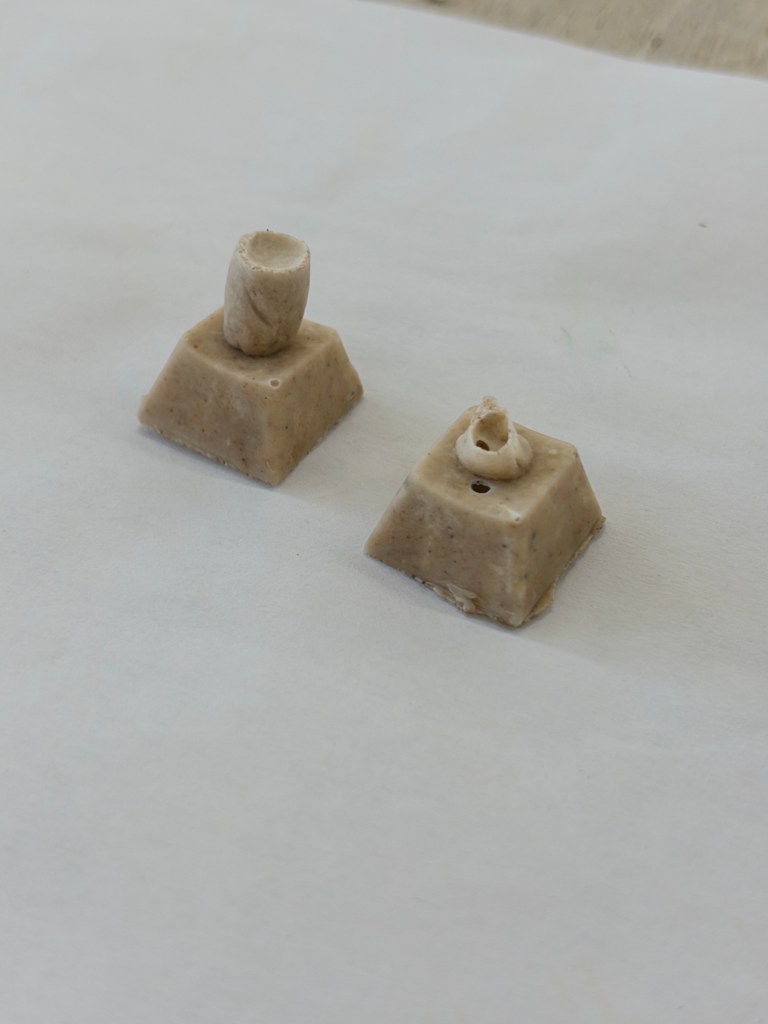
Taxonomy Update
While I’ve successfully categorised and put details for a lot of metals, I think I might have taken the word “taxonomy” too literally. The PDF requirement for submission made more sense when in a lecture, Mike showed everyone a book about different materials and industrial processes.
My current taxonomy, while sleek and easy to use in the program it was made in (Figma) would not convert easily to a PDF, without it simply being a huge image of the entire taxonomy.
I’m considering re-doing the taxonomy, possibly in InDesign (which I would need to purchase). Or some other equivalent software.
While this is annoying since it’s setting me back in my progress quite a ways, it’s also quite exciting, as I enjoyed the graphic design work for the personalised brief, and so I think the book design could be quite fun.
Possible future plans
After speaking with the DFL lab technician about what materials are feasible for my project, it was mentioned that we have access to a high fidelity CNC machine that can cut non-ferrous metals such as brass. This is huge, since metal keycaps were what I always wanted from even before the start of this project.
Other ideas from that discussion included:
CNC cut wooden keycaps.
Burnout 3D prints for casting.
3D printed moulds for casting pewter.
The CNC projects will have to wait until I learn how to use the CNC machines, which could be a while. Until then I will continue to experiment with various different epoxy resins and ceramics.
Retrospective
From this point on in this project, I will be documenting in the past tense since I’m writing this at the very end of the project in hindsight.
The taxonomy has taken the shape of a magazine, made in Adobe Indesign, and is a lot less technical than the previous attempt, but also a lot nicer to look at ( and much more time consuming to make!)
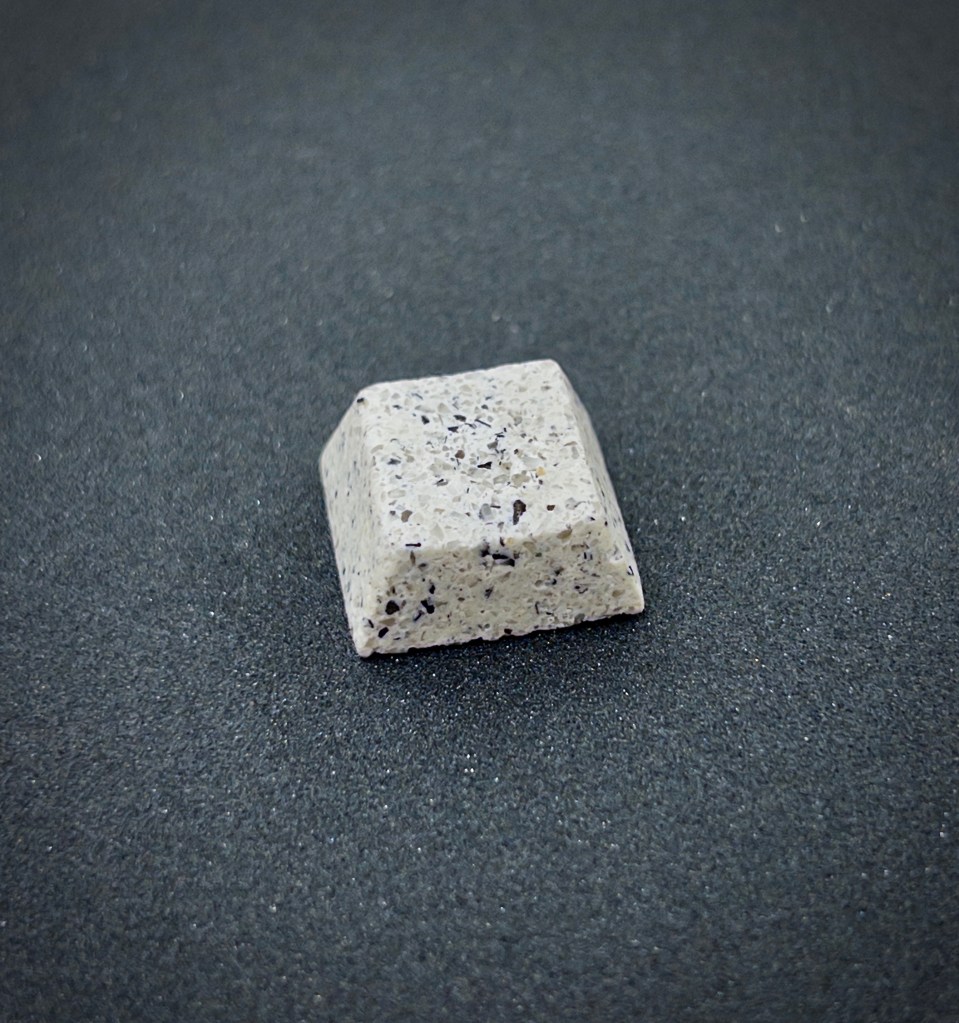
The 2 part mould project has been entirely focused on ceramic keycaps, and combating the challenges I faced when creating porcelain, clear glazed keycaps.
I didn’t manage to get inducted on the CNC machines in time to create brass keycaps – however they would have been irrelevant to the actual brief, which required a two part mould.
The Jesmonite experiments had varying degrees of success. After allowing it to harden for a significant amount of time, a jesmonite keycap made from the jesmonite-aggregate mix showed surprising strength and usability, while having a unique texture and look.
I began sketching and modelling ideas for ceramic keycaps.
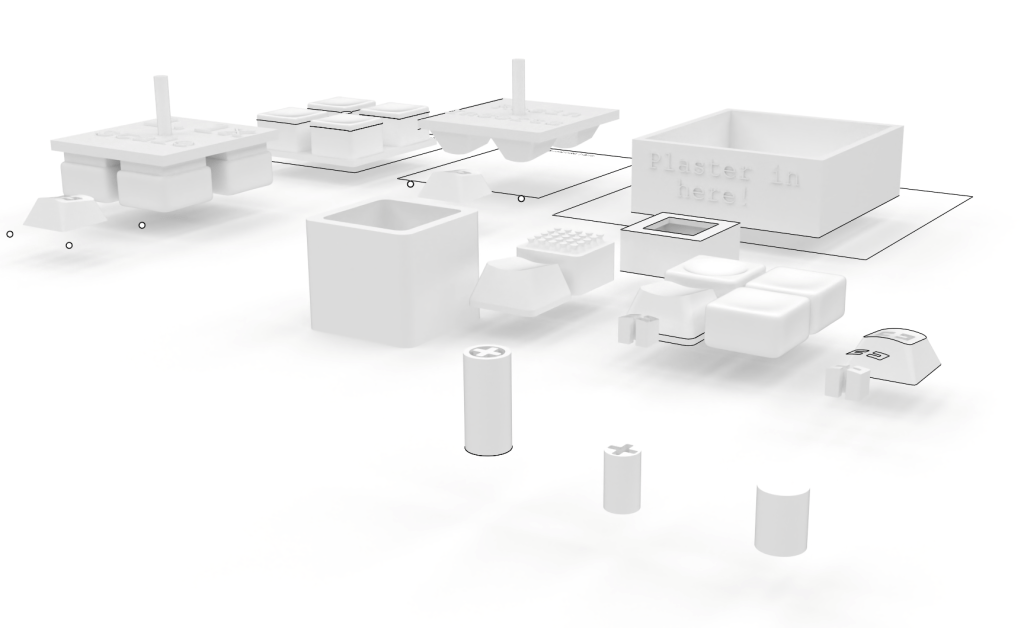
The entire 3D side of the project took place inside a single rhino file for easy referencing. One point of struggle initially was how to make the keycaps my own design. There are many standardised things when it comes to the design of keycaps. The underside must be hollow, with specific shapes protruding to attach to the keyboard correctly, and with no wobble.
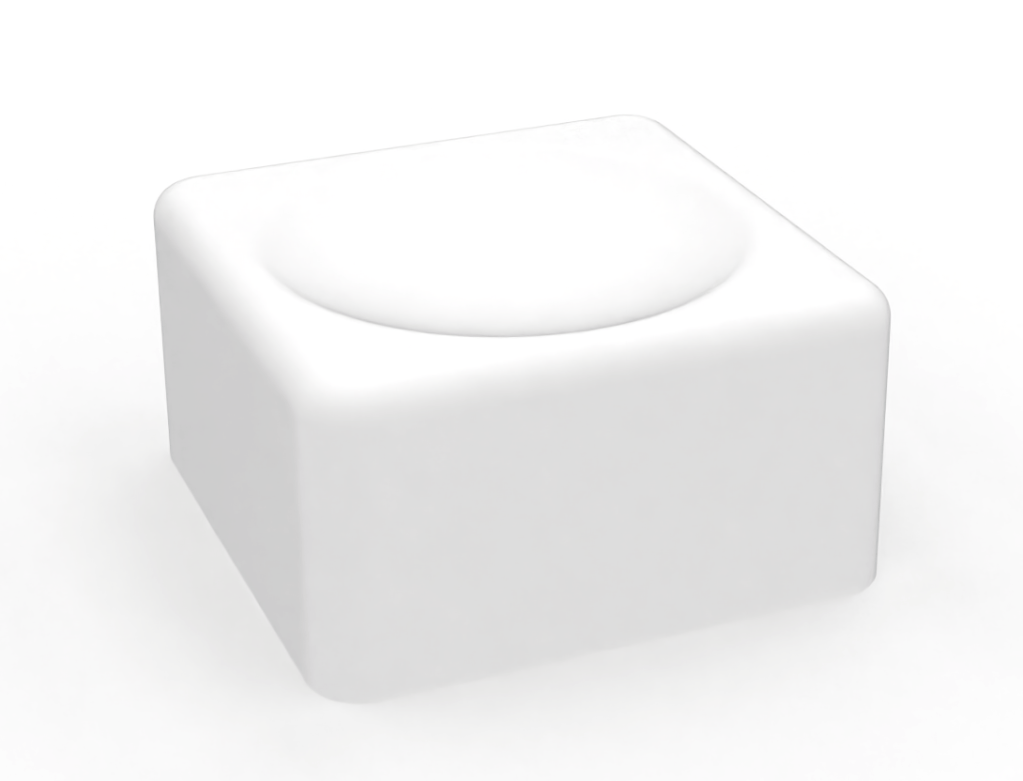
My solution was to change the outer shape of the keycaps to a more interesting, rounded cube, with an indent for the finger.
As can be seen in the Rhino file, there were many different routes I went down, experimenting with ideas for how to create this keycap.
Grippy Keycap
The idea here was to create a form I could press into some low temperature setting substance, such as jesmonite or some kind of clay. The overhangs were to “catch” the material and create a better bond.
Clicker Box
I created a box to fit a mechanical “switch” – the part of the keyboard that the keycap rests upon. Once constructed, it became quite an addictive fidget toy!
Geometric Ergonomic Keycap
This was an attempt at a more geometric, but still rounded, keycap. It wasn’t as comfortable to touch as I’d hoped, but the lines left from the resin printing process were quite beautiful.
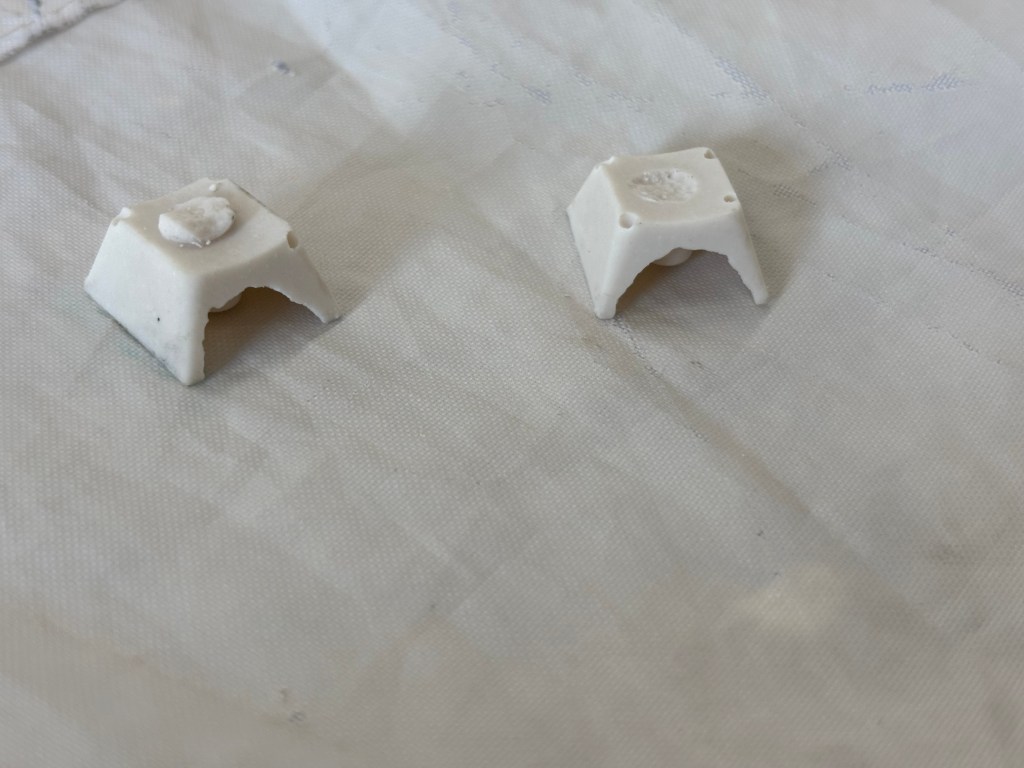
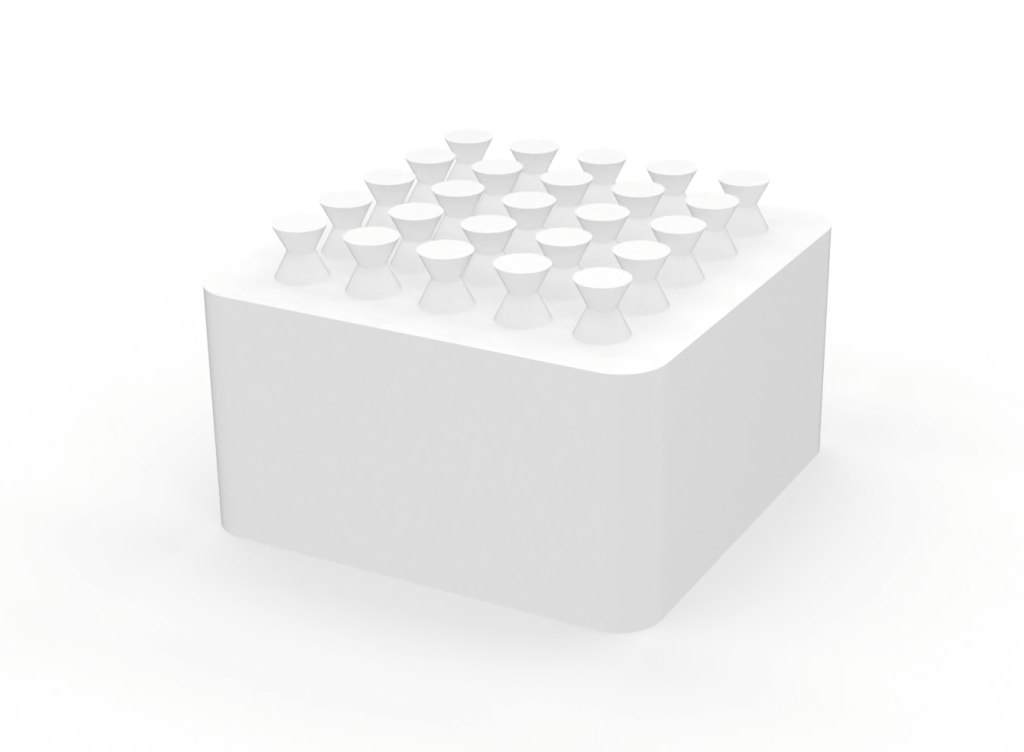
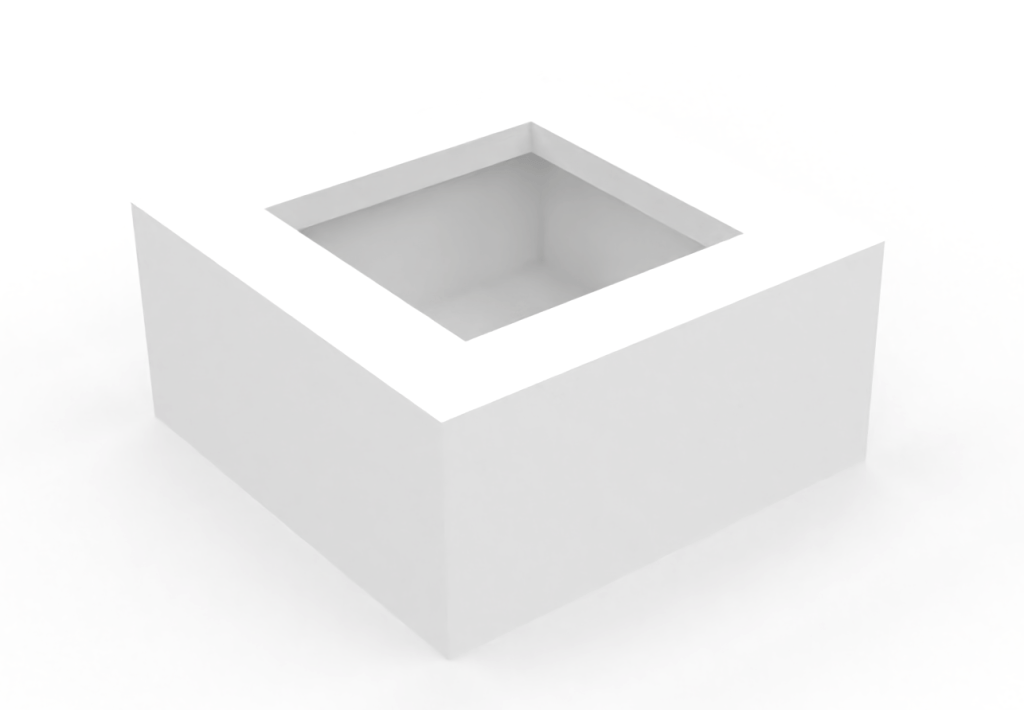
Mould Maker V1
This was my first attempt at creating the insert, from which I would create a plaster mould. This plaster mould would then be used to cast porcelain keycaps. It is 1.1x scale to account for shrinkage of the keycaps before firing.
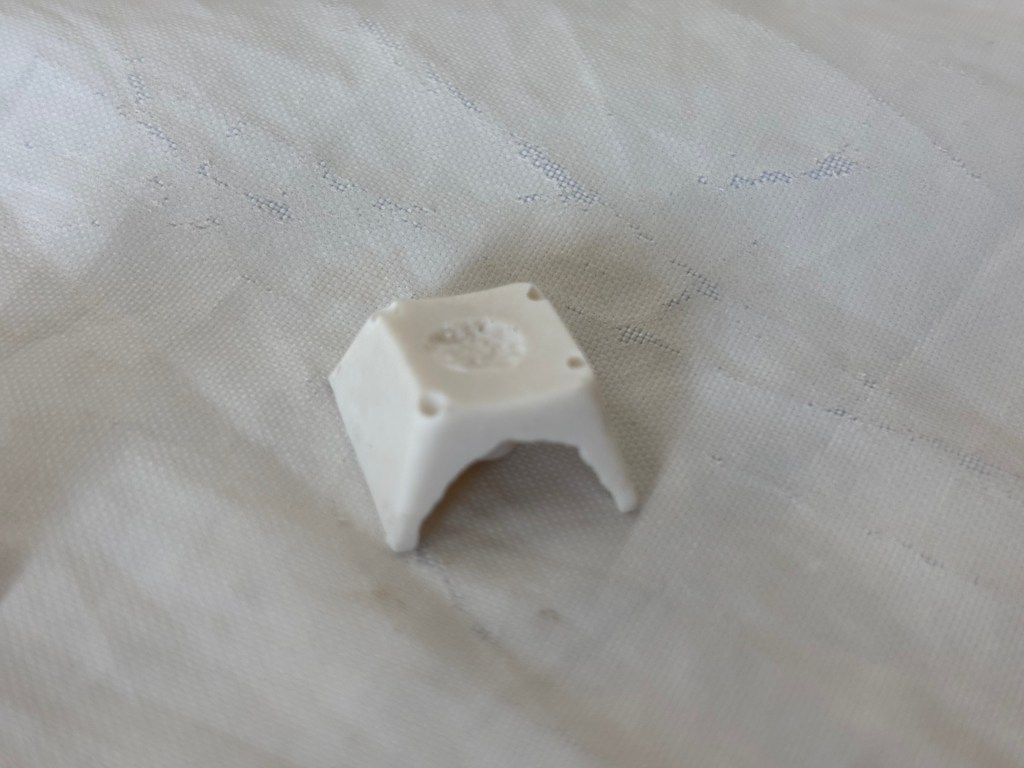
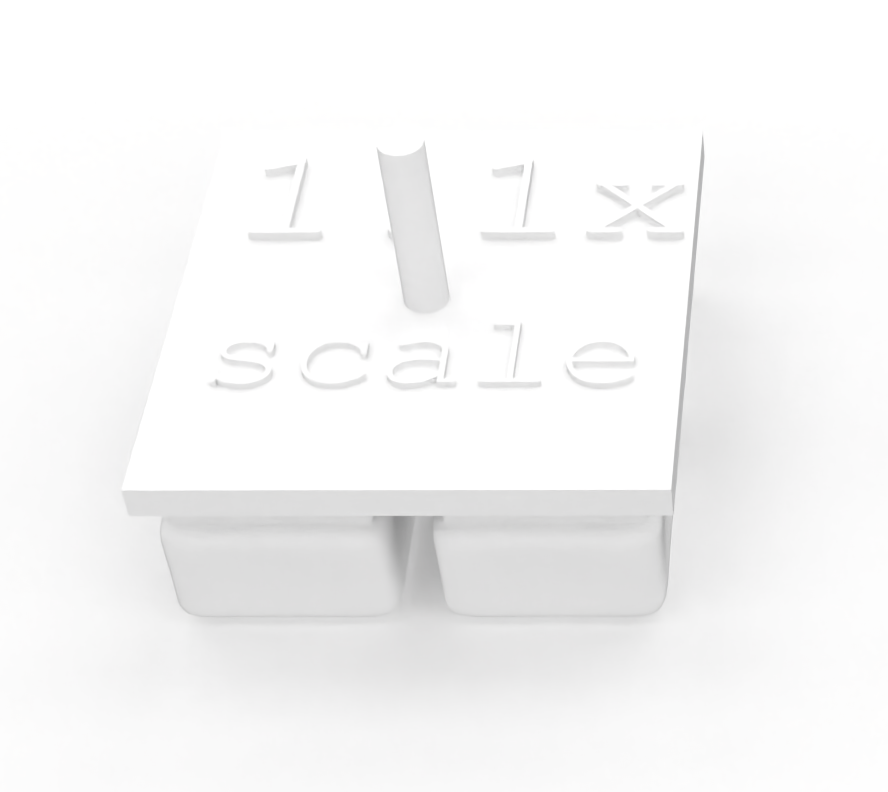
Mould Maker V2
This was my second attempt at creating that plaster mould. This time with much straighter walls, to allow the piece to get out of the plaster mould. The cylinder in the middle (which was for guiding inserts later on) was facing the same direction as the keycaps because this new piece would be sat flat on the table as plaster was poured around it, so it couldn’t be bumpy on it’s back.
Last Resort Inserts
As the project came to a close, I could see that my original plan for the two part mould wasn’t going to be completed on time. To insure I still had a presentable prototype, I 3D printed some inserts that attach to the mechanical switch. These were then glued to the underside of the porcelain keycaps after firing to provide a functioning replica.
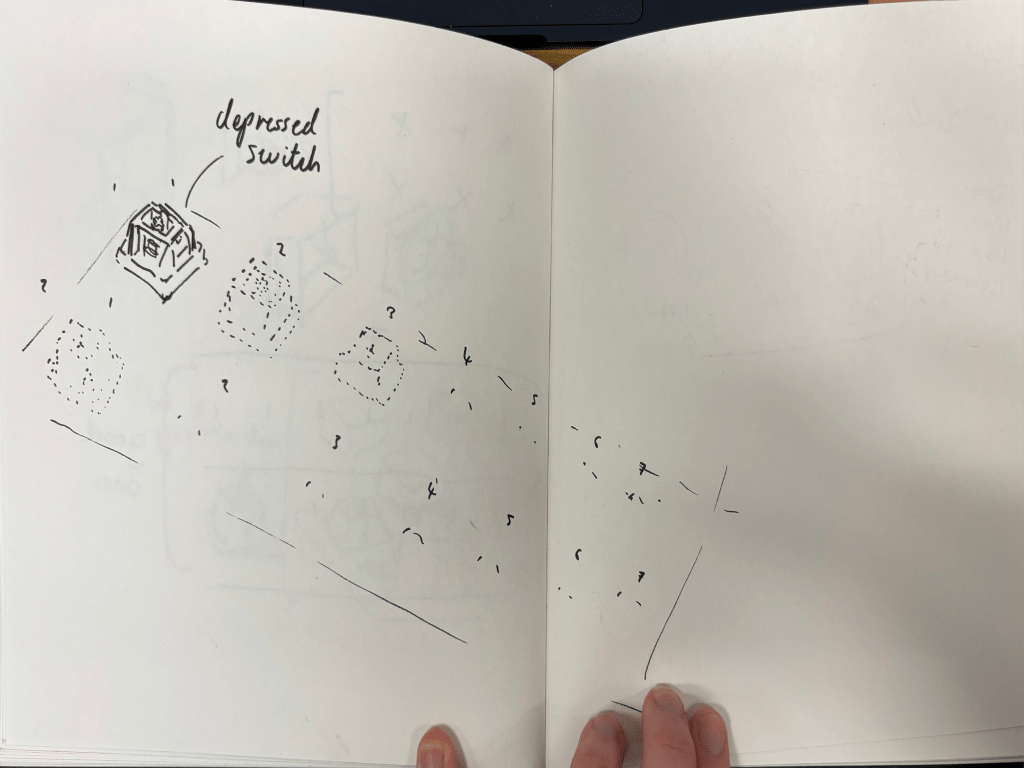
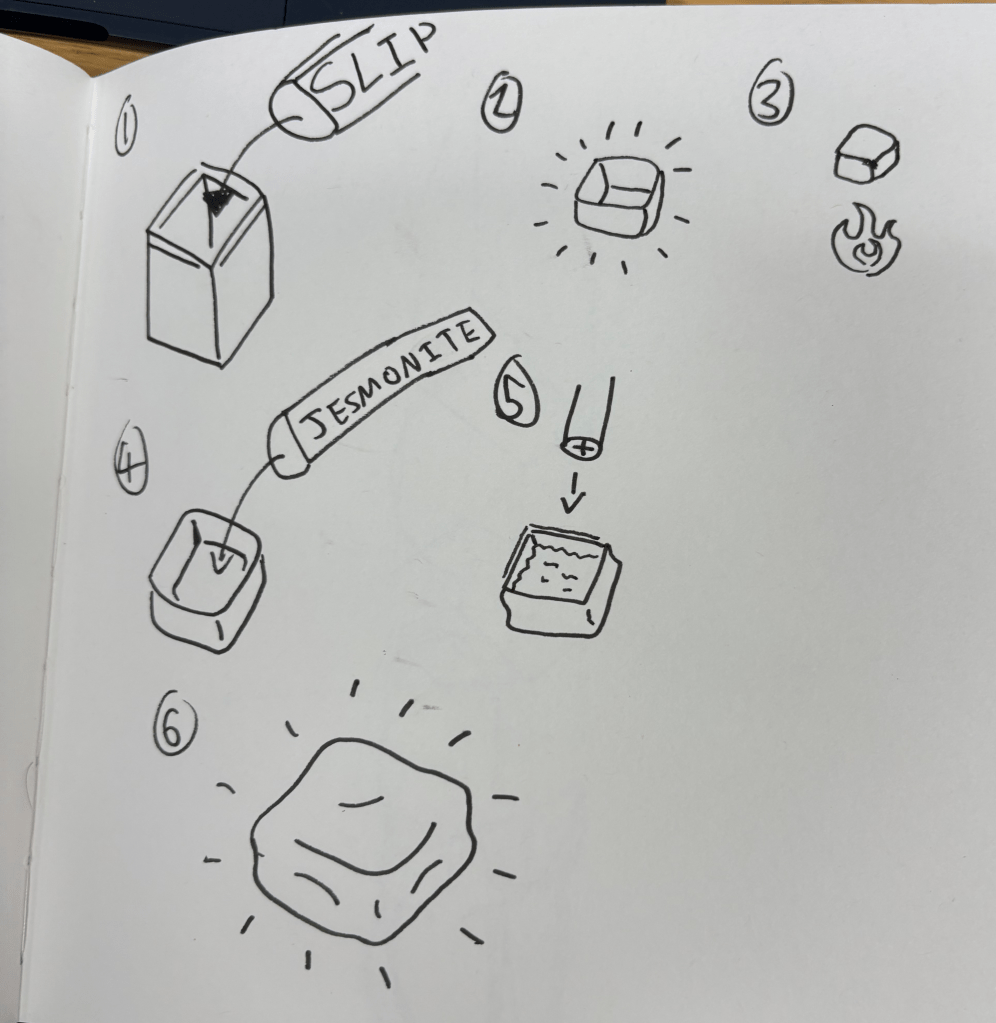
Around the time I decided to create ceramic keycaps – somewhere between discovering that slip casting would mean a one-part mould and the actual creation process – there was a small interlude of me channeling an aimless panic into my sketchbook in hopes that I would find some first steps – or at least a direction to step in.
The production process was slow but I kept myself busy creating many batches as I waited for the clay to set, dry, fire, and fire again. There was lots of downtime, as i’m told is often the case with ceramics.

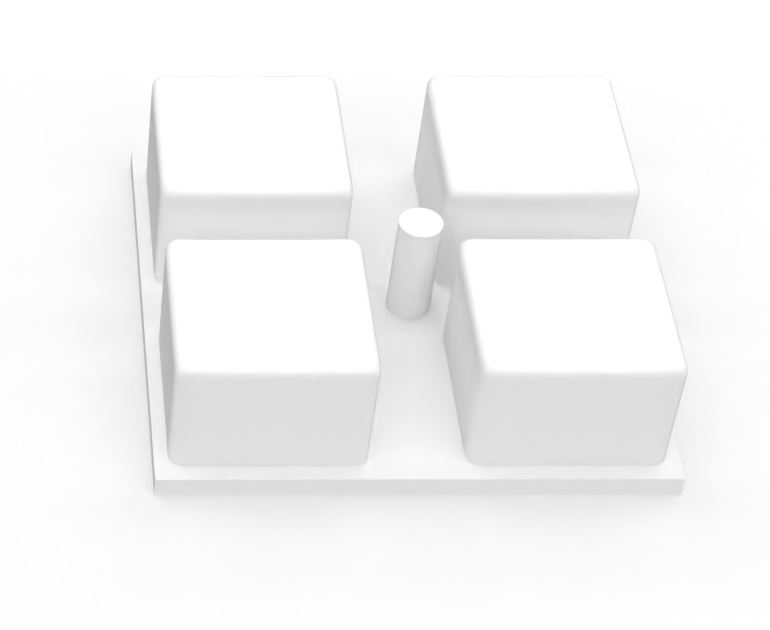
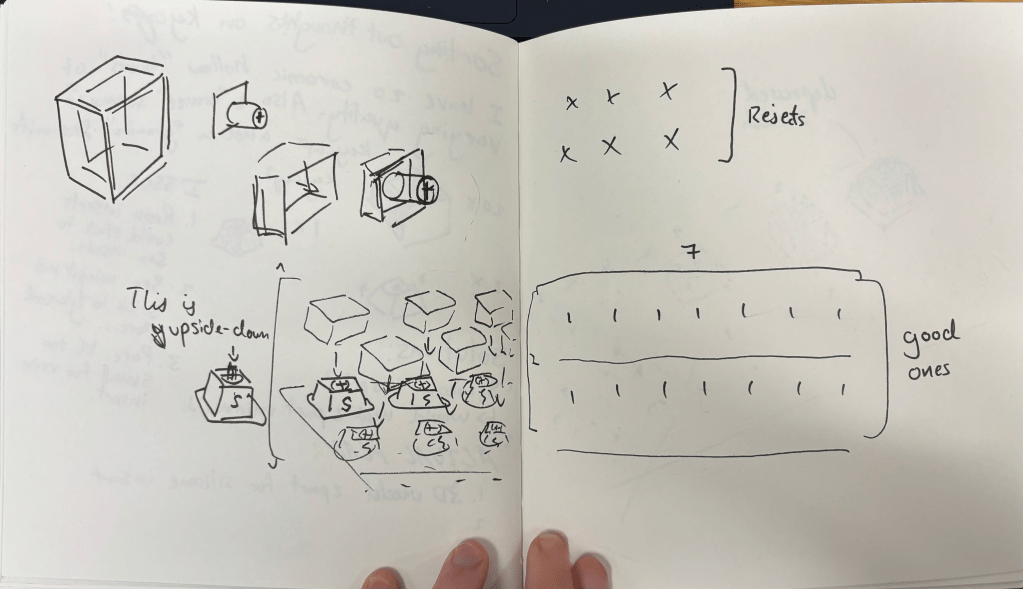
The plaster mould had 4 slots for pouring. 4 keycaps at a time. This method was slip casting: the method of keeping the liquid “slip” in the mould for a short time (in this case about 3 minutes) and then pouring it back out. What is left is a thin layer attached to the mould, which can then be removed after drying. 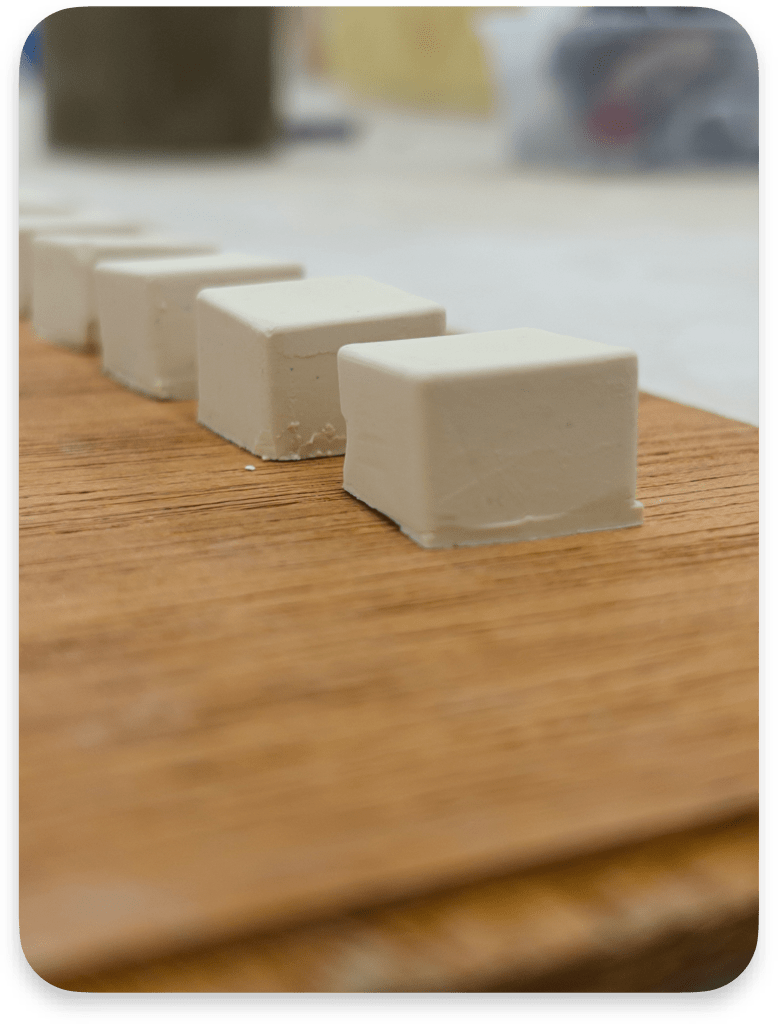
The clay is dry enough to be removed, but still far too wet to work with. With the thin 1-2mm walls, any force exerted on the keycaps in this state will deform them. I imagine in industry, this would be the most difficult stage to keep consistent; even the force of removing the clay from the mould with gravity can leave marks. 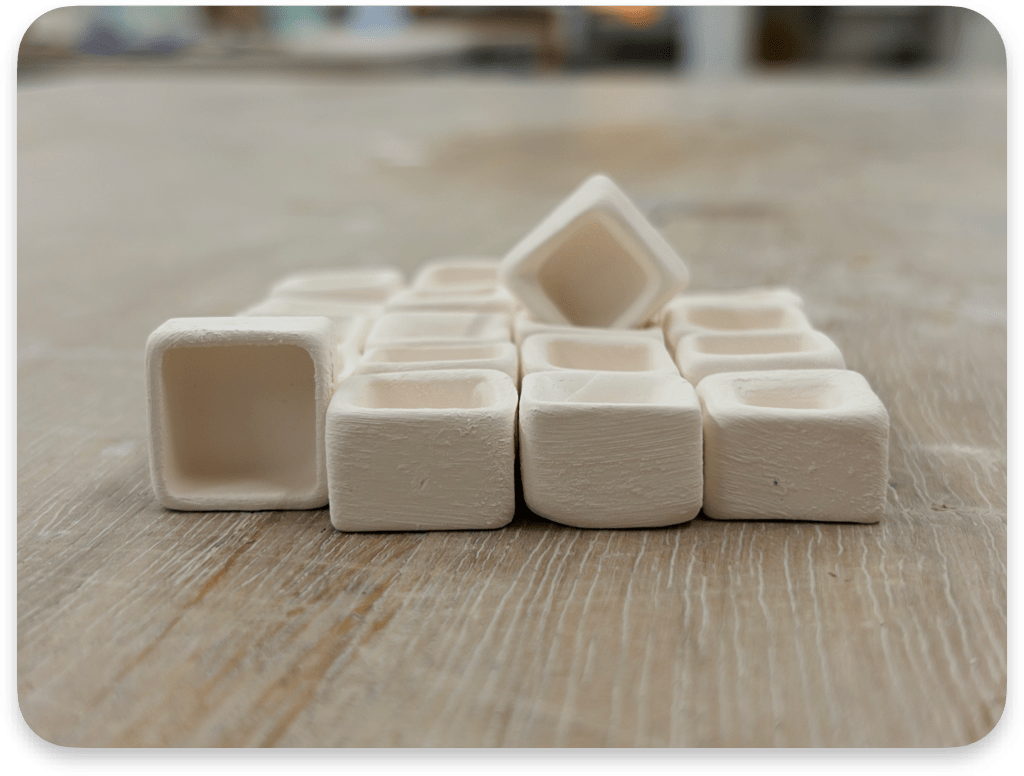
The result after leaving to dry in a hot-cupboard and then being fired in a kiln. The varying wall thicknesses shown off here are a result of a difference in times spent before pouring; the more time spent, the thicker the walls. This variation was intended to find a balance between interior space (for the mechanical switch) and wall strength. I ended up favouring the thinnest walls that survived, however, since the thicker did not have enough room inside. The next and penultimate step when it came to the ceramic side of the project was glazing and then re-firing the glaze
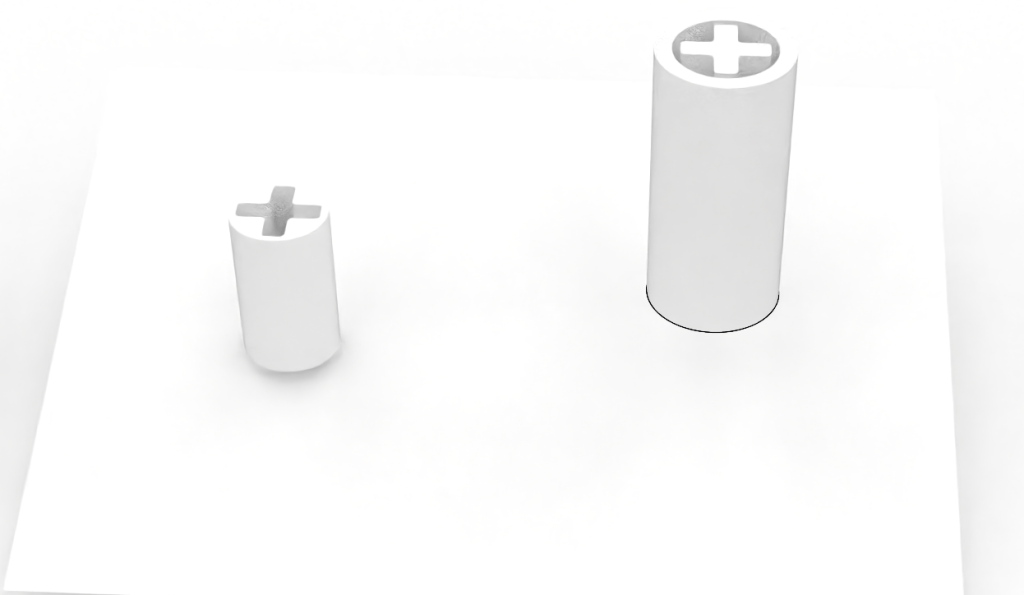
Et Voila!
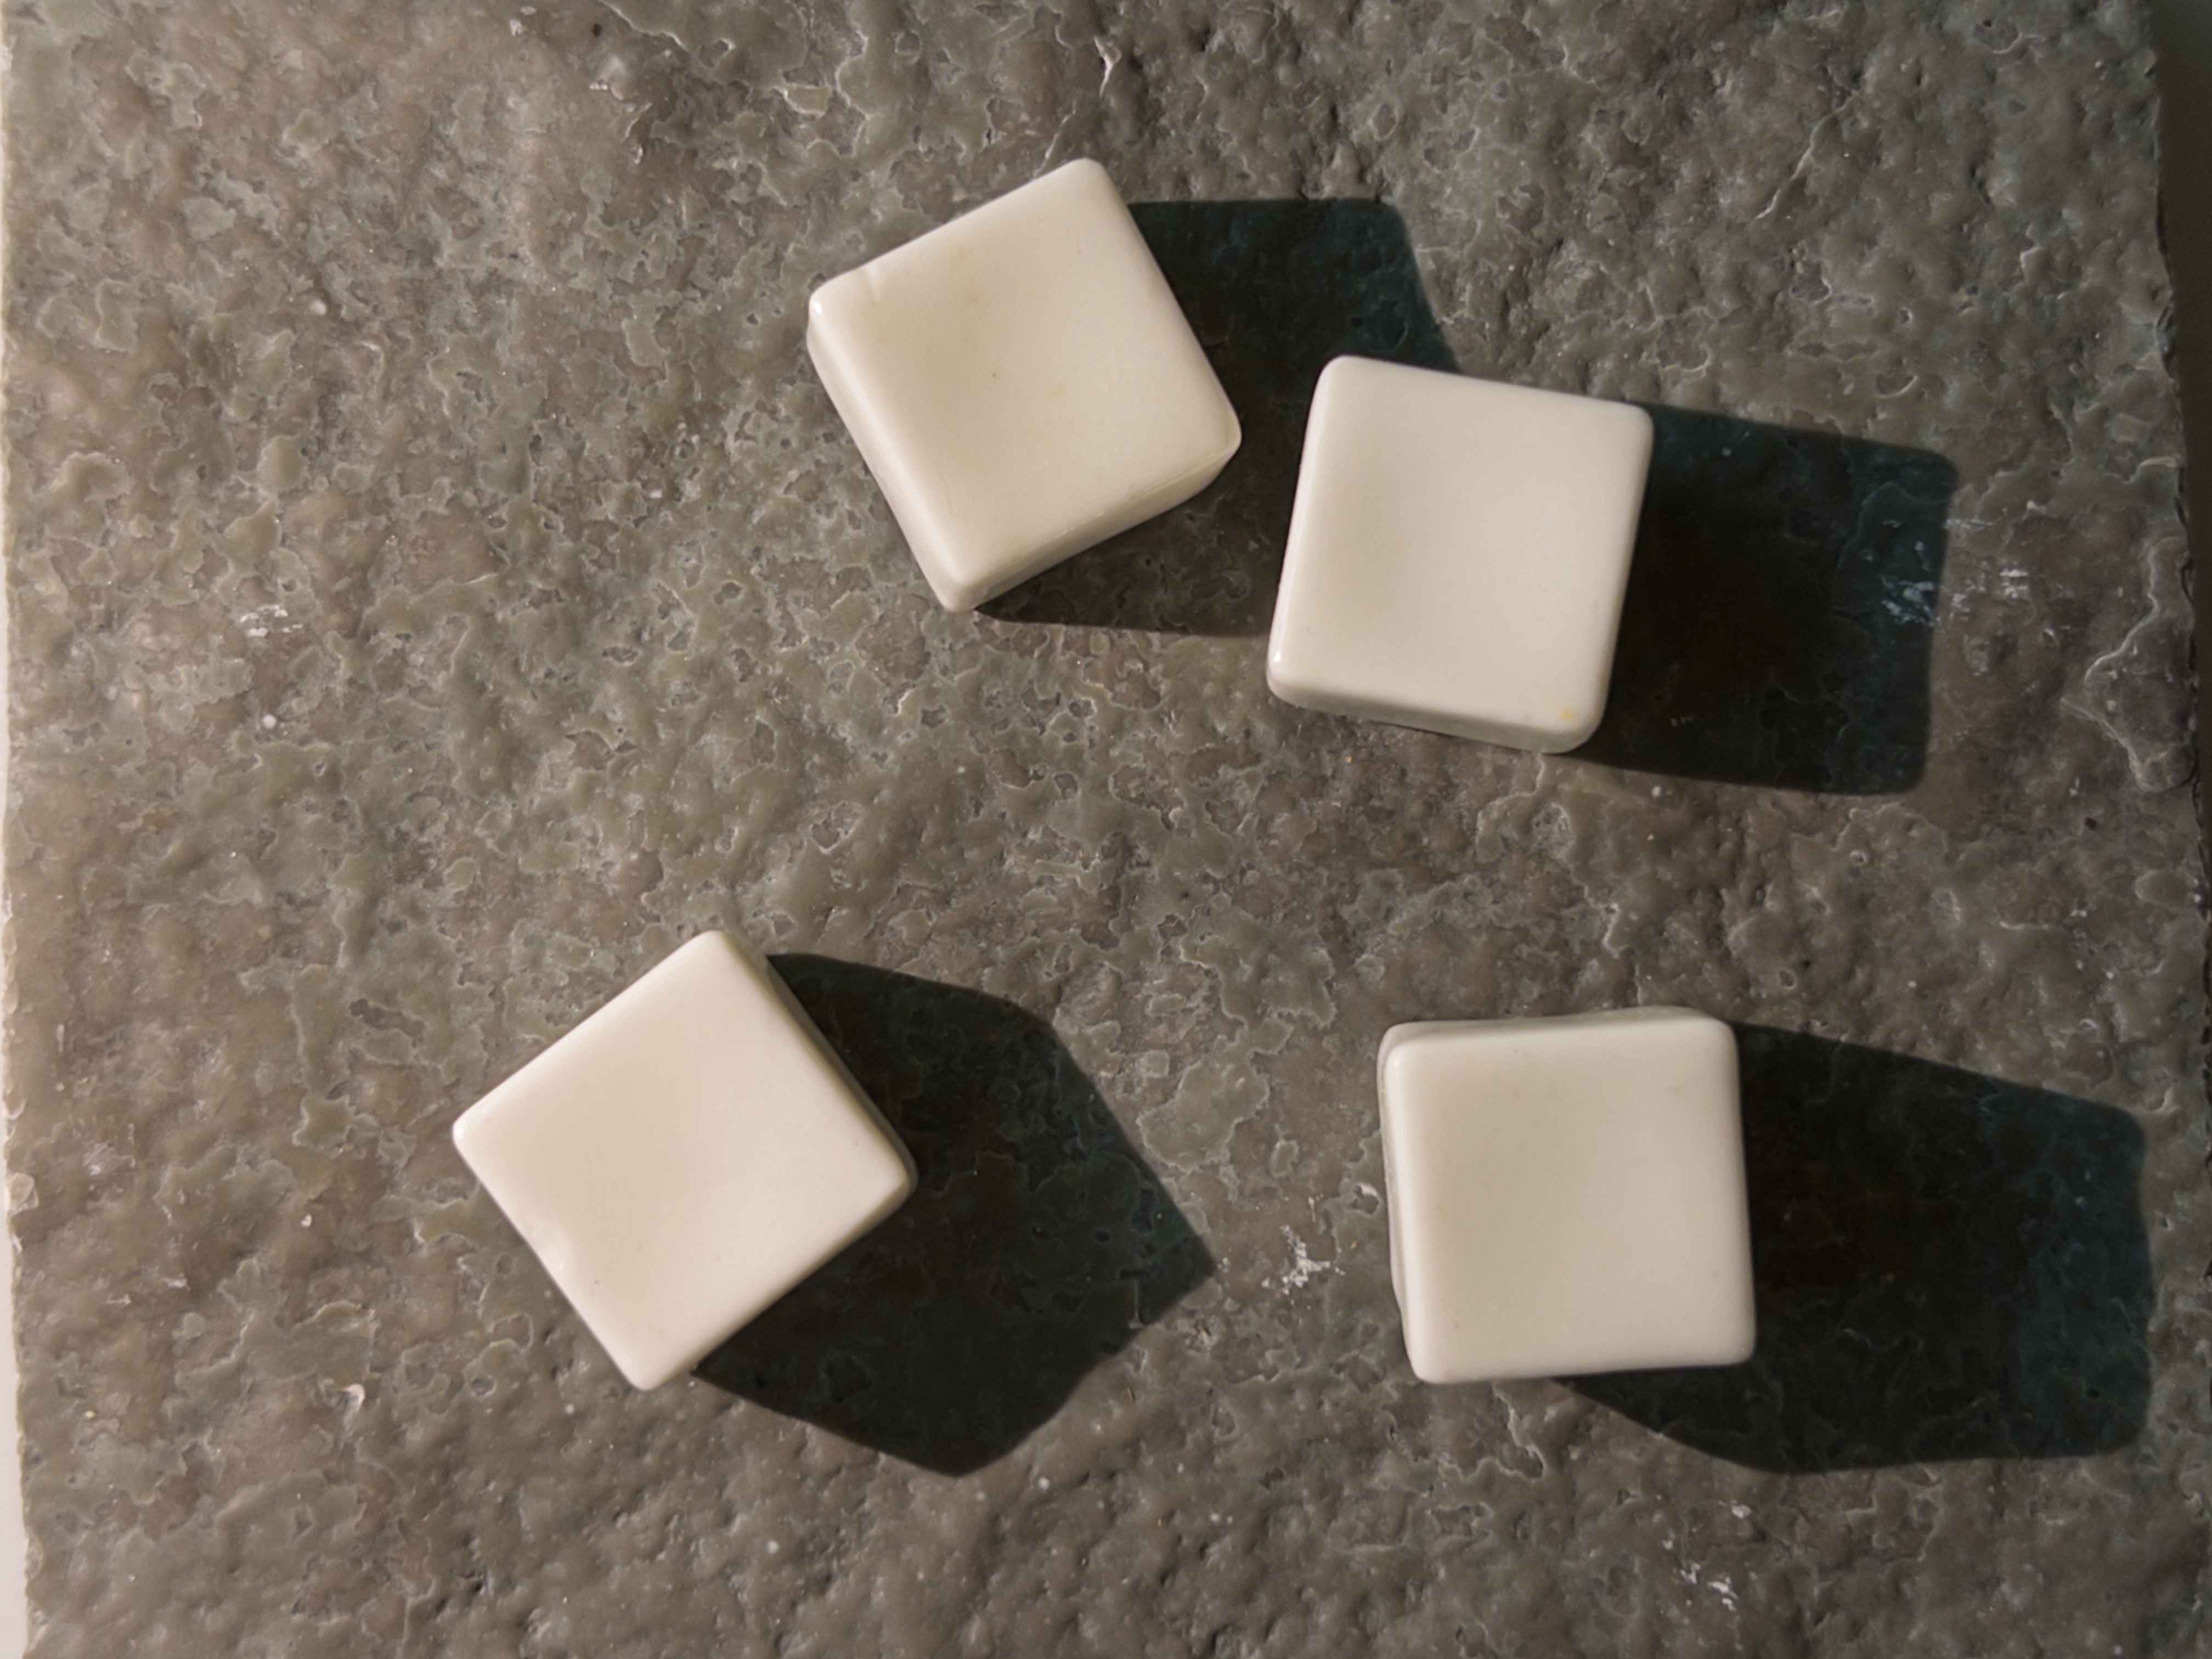
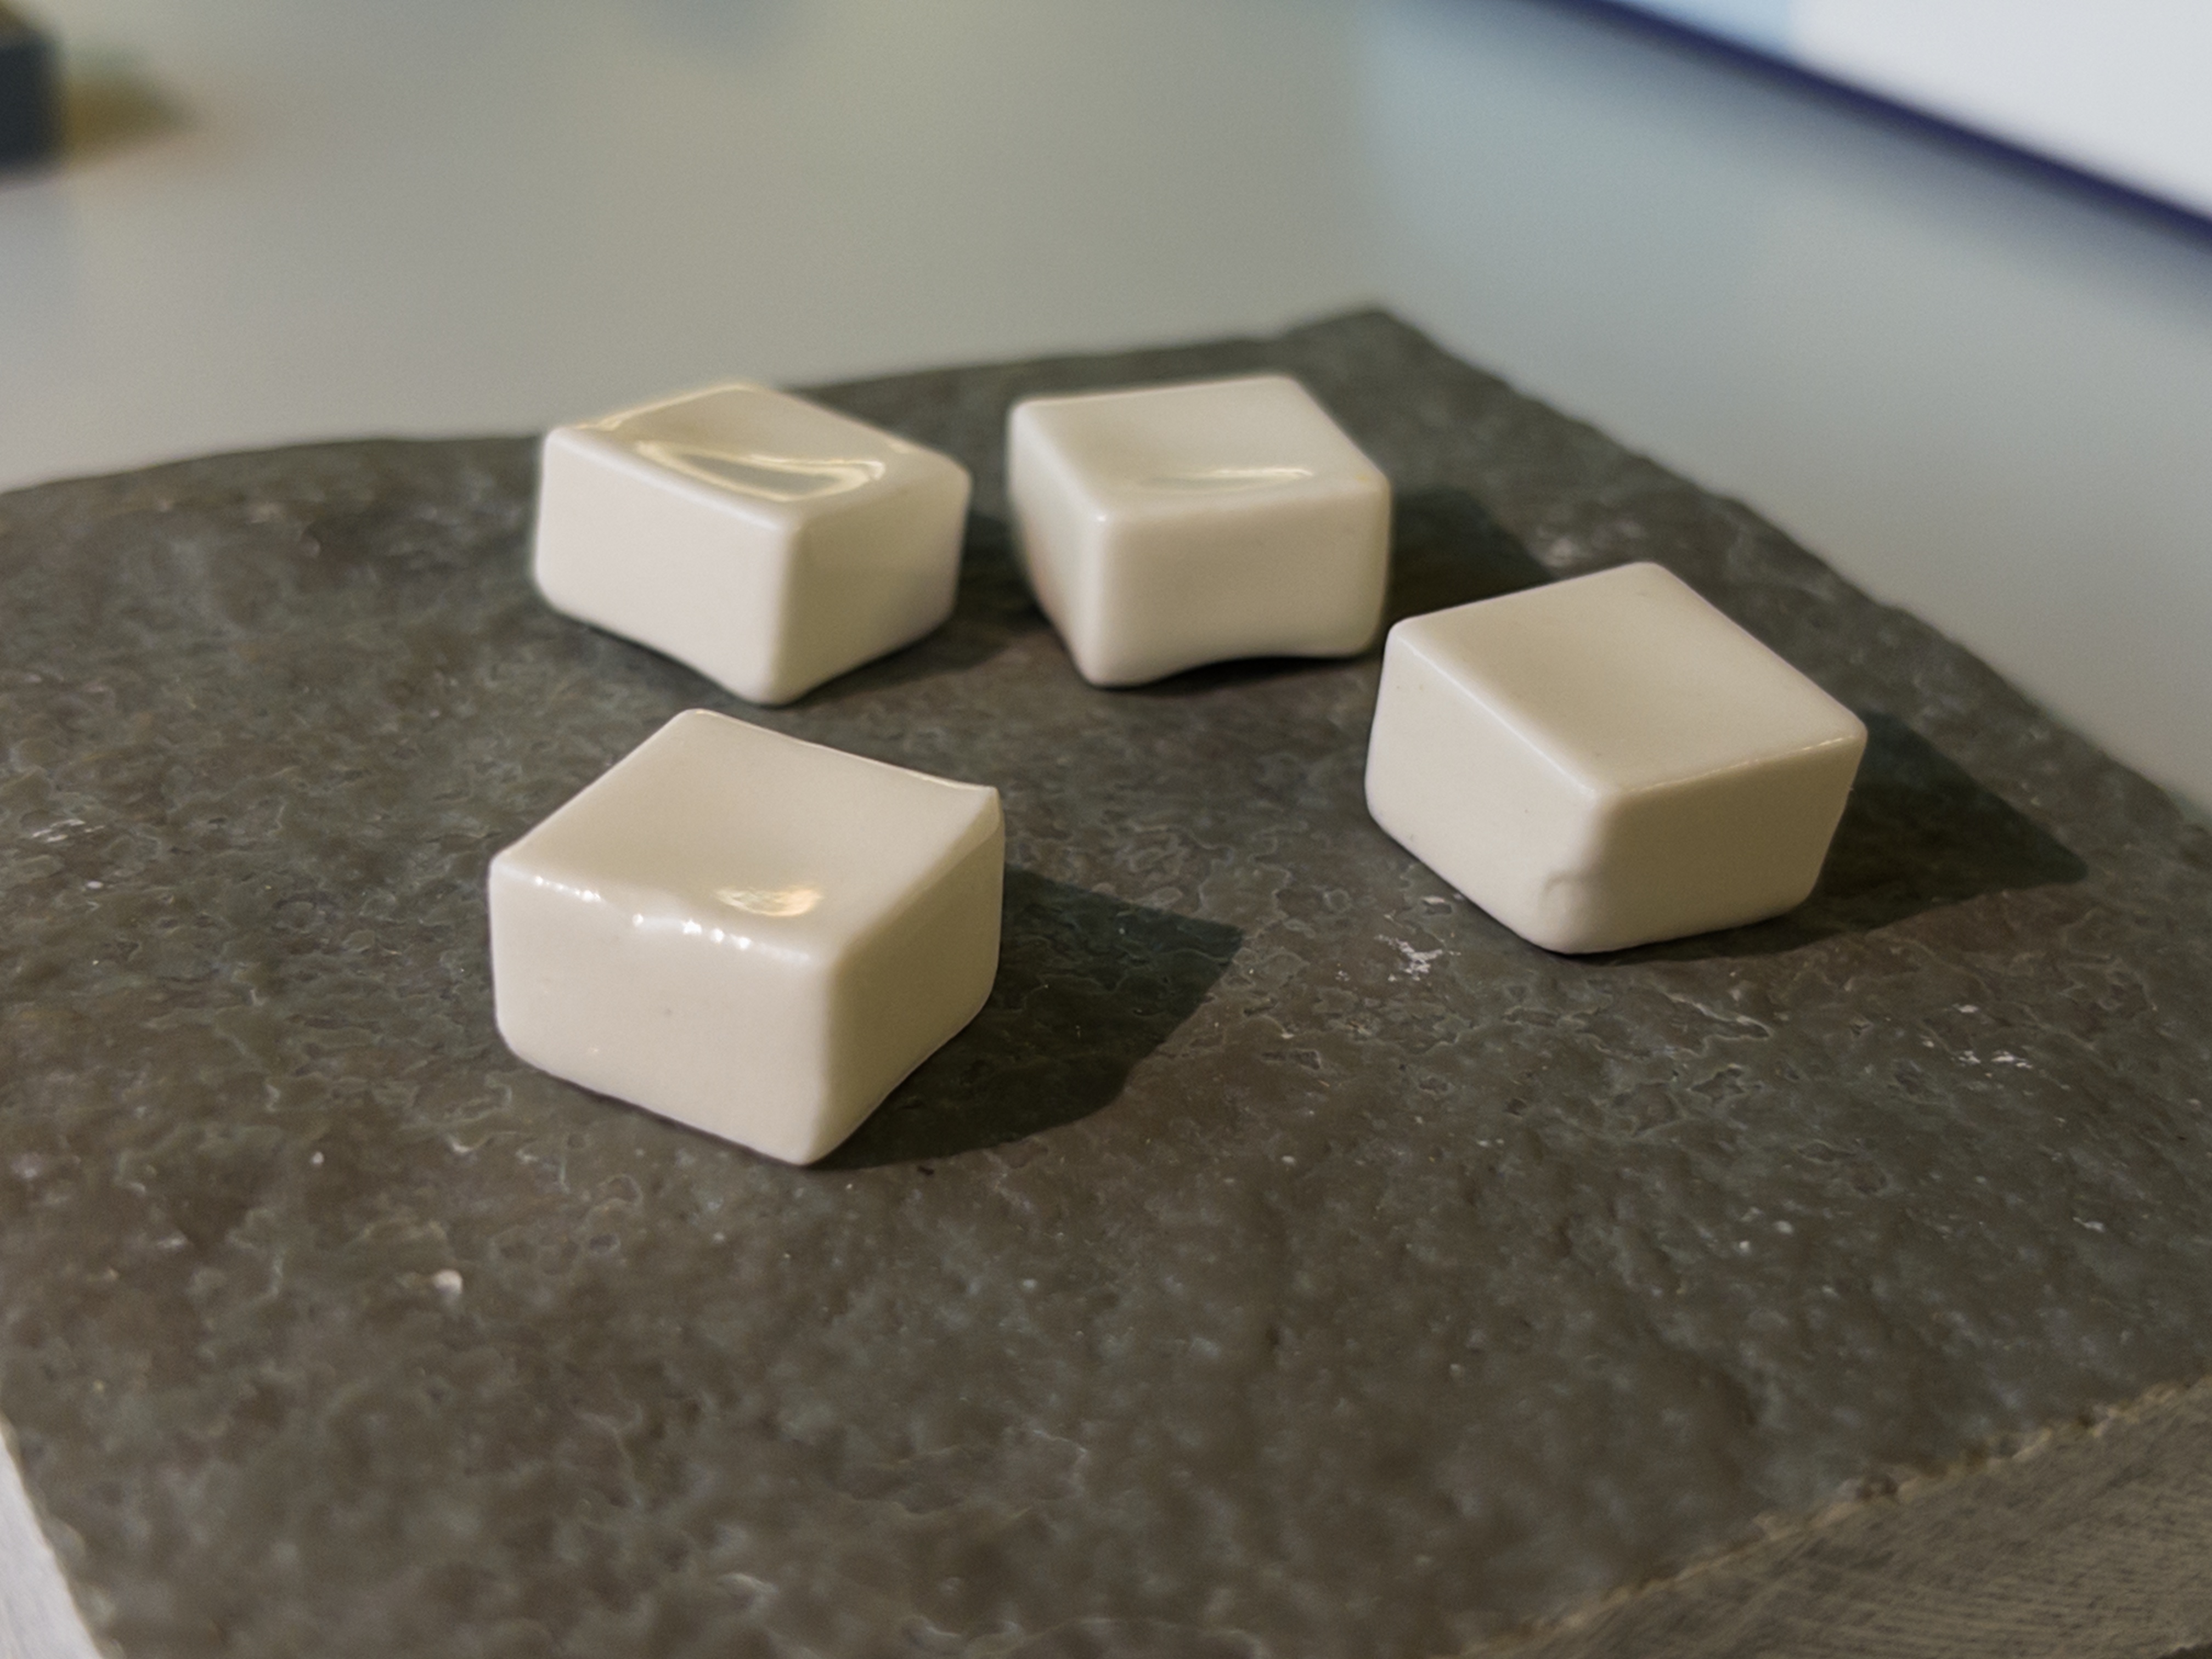
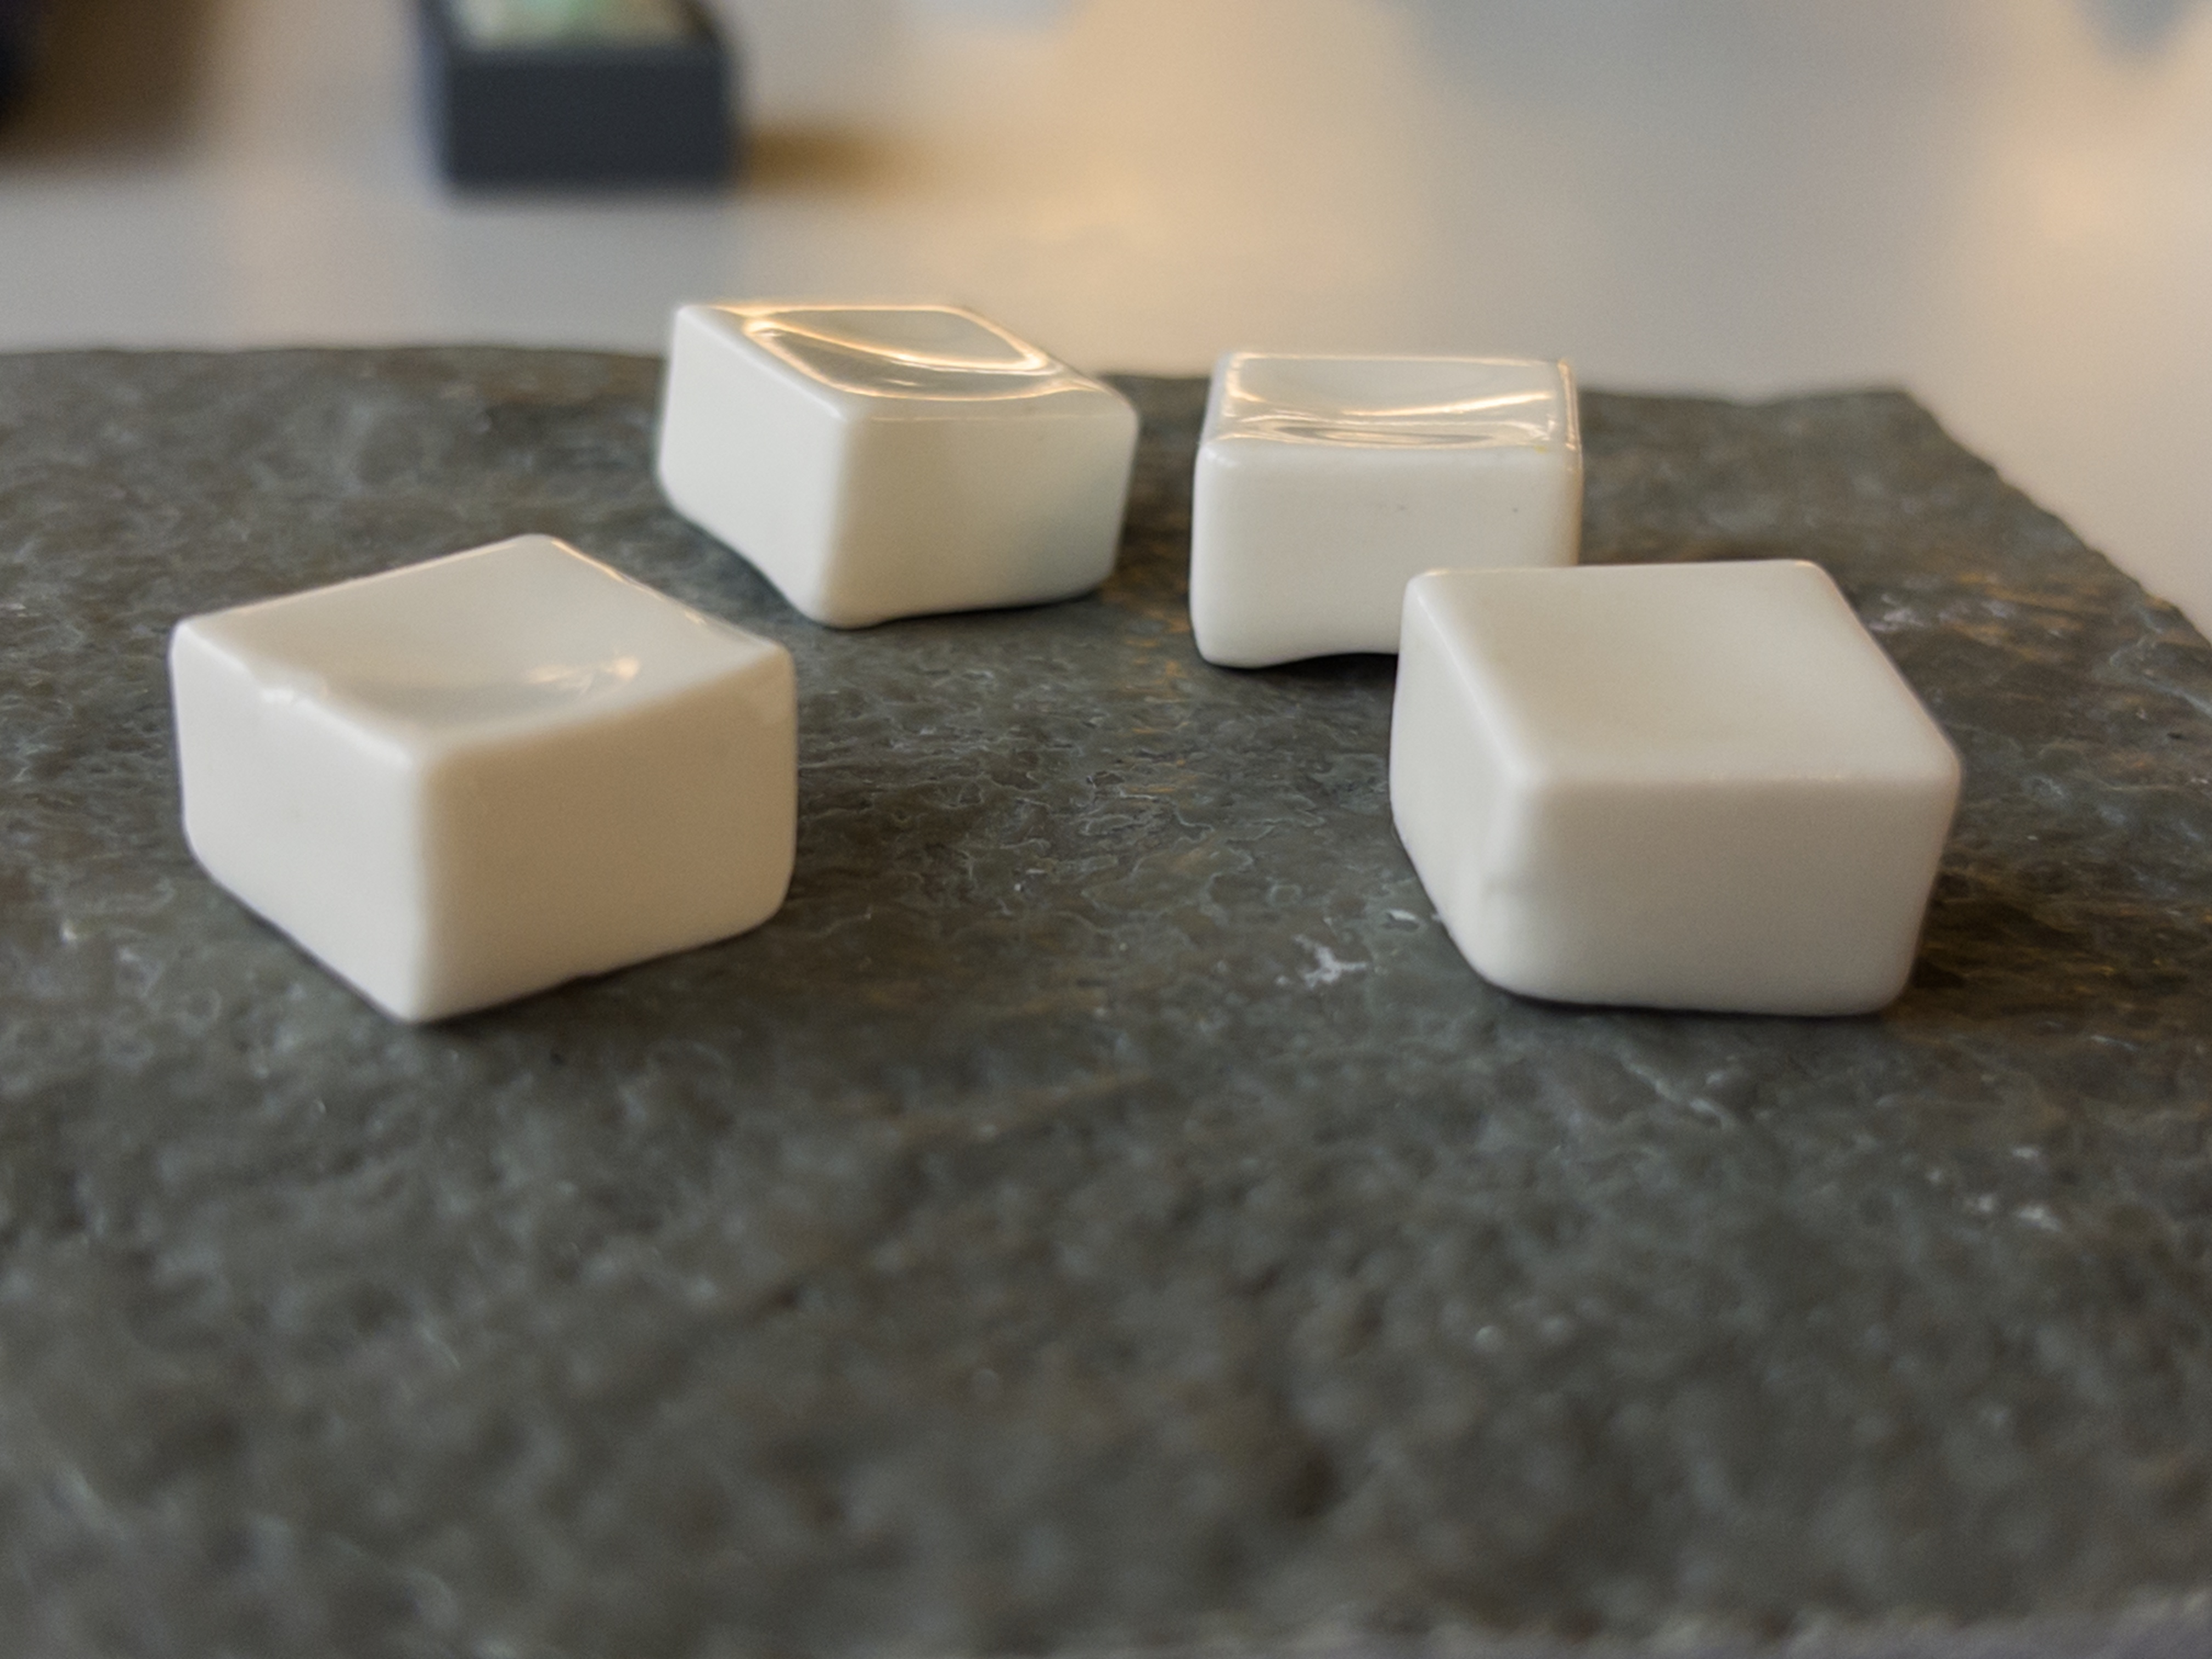

The jesmonite component would usually be hidden in use, so this is what the final product would look like! They’re very pretty and feel wonderful to touch. I would say that the shrinking process in the second firing (or possibly an illusion of the glaze) has made them suddenly feel a lot smaller than I expected. The top of them is about the size of the top of a normal keycap, but keycaps are trapezoidal, and the top is actually much small than the rest of the keycap.
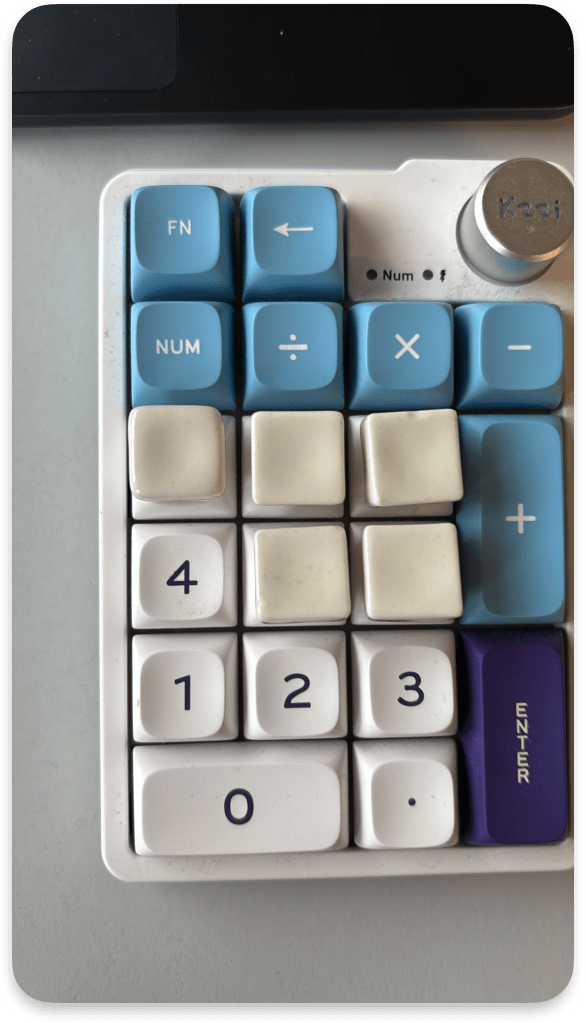
Here they are place on top of my bluetooth numpad:
I unfortunately cannot host the taxonomy because as an educational project I have used unlicensed images – fine for education purposes but I am unable (or rather not allowed) to upload them online.
